
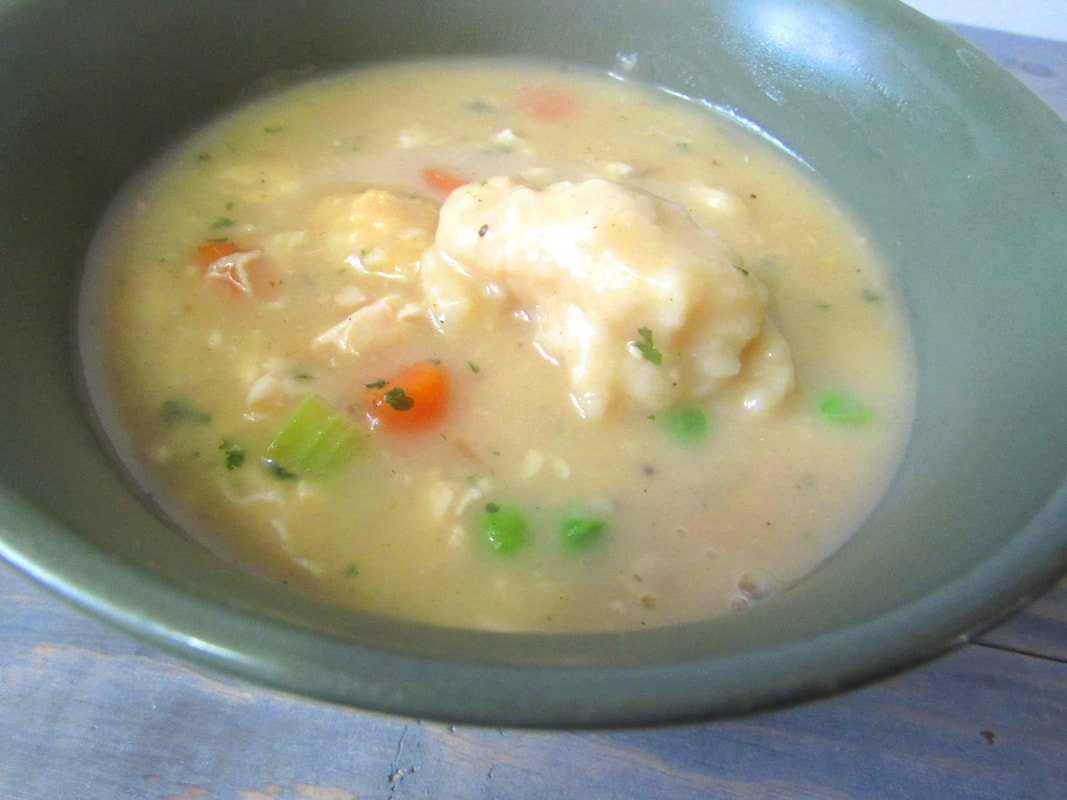
 Dearest FoodiesThis one is going to be short and sweet. Times are tough, right? But you don’t need me to remind you of all that is transpiring in the world right now. We all know that things are cruddy in general. So instead of going on a spiel about the barren wasteland of the grocery store, I will spare you all those details. I have a little story about my dad instead. My dad did three types of meals spectacularly: breakfasts, stews, and breads. I mean, there was a time when he made some stuff that I wouldn’t care to eat again, but he did make some beautiful chicken n dumplin’s with the fluffiest, cloud like dumplings ever. I found myself thinking about his stews and such last night in the wake of his death anniversary, which is a vast improvement to the blubbering I did the year before. I thought, “You know what? I am going to make this.” But I don’t have leftover chicken and I certainly don’t have any chicken broth or stock on hand. Oh yeah, barren stores and such. Ugh. I do, however, have canned chicken breast, and I do have chicken flavored stuff like bullion cubes… I can do this. With that, I share with you: Hard Times Chicken n Dumplins
Method
In Closing...This is a quick little recipe of comfort. It uses mostly pantry items and is a good way to fill yourself up. I hope you enjoyed this little recipe.
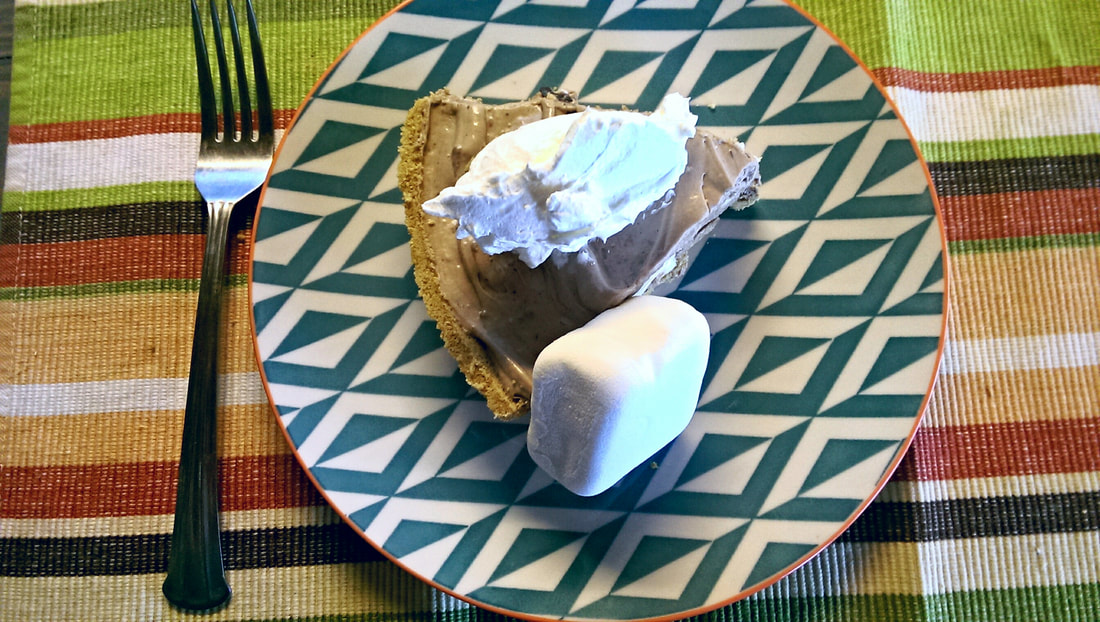
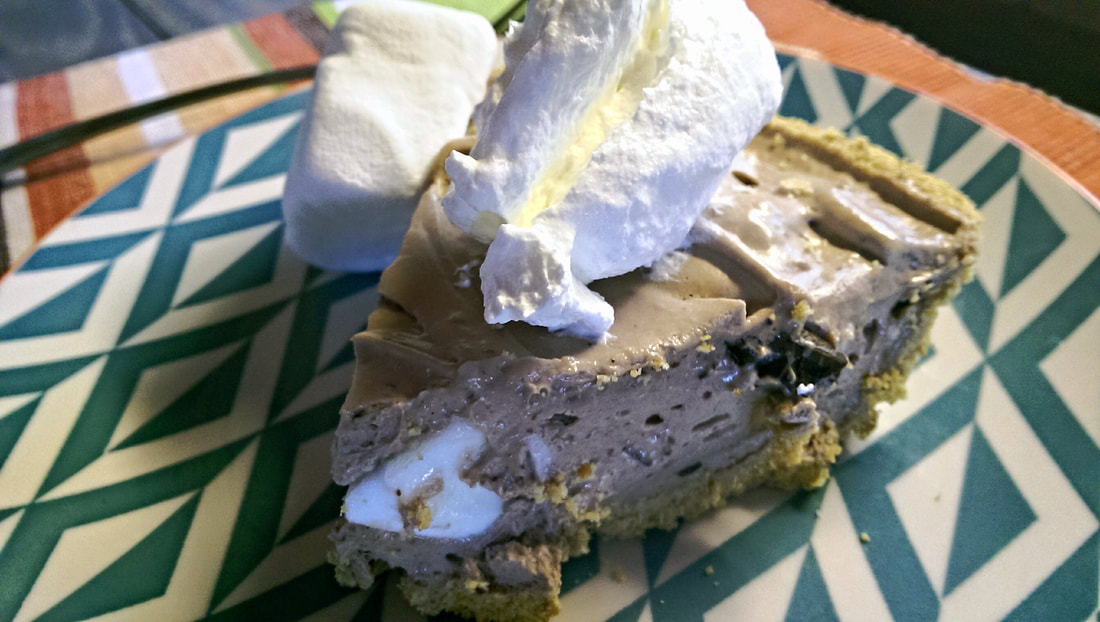 I wanted to make a no-bake cheesecake... ... that tasted like S'mores. So what I did was exactly that! This was a joy to make and this can be had all year round and it is easy as... well... pie! While I don't have some amazing story that comes with it, I thought I would at least give you a quick recipe so that, again, you knew I hadn't forgotten about you all. I made this pie back when the summer was just about to start and I had wanted to make some stuff ahead for the blog and just never got around to posting it until I remembered it was in my folder. I bought a bag of those giant s'more marshmallows and they are what actually inspired the whole blog to begin with. I even decided to roast the marshmallows to give it that toasty flavor and it was definitely the right call. It definitely tasted like a no-bake cheesecake and s'more's combined, and it was a delight to eat. RECIPE
 And then...
And that is it. This has a nice smokey flavor to it and it tastes nice and tangy from the cream cheese. Additionally, you could add flakes of salt but I don't think it needs it, as the acidity in the cheese does cut through the sweetness, as well as that pungent flavor of the dark chocolate as opposed to milk chocolate so it isn't overly sweet. You do not need to add vanilla since it is already in the marshmallows.
I hope you enjoy! I know this is another quickie! As always, happy eating, happy belly. 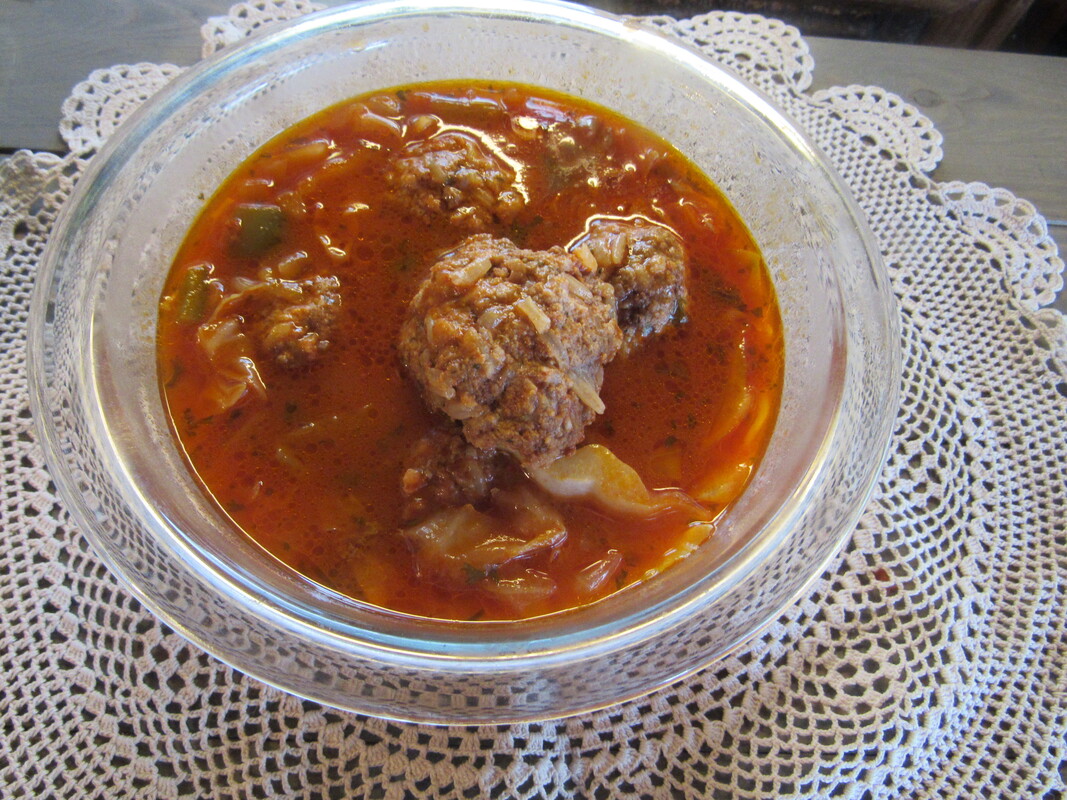 As you may or may not know... I am a cabbage roll junkie... But sometimes I just don't want to spend an hour trying to get the cabbage leaves peeled without tearing them and it is this huge, long winded process that I thought I wanted to cut down. It was also in the middle of the summer that I decided to go balls to the wall and make soup. Foolhardy? Absolutely. Worth it? Absolutely. I was really craving golabki, I eat the stuff nearly all year round if I can get away with it... but didn't want to wrap stuff or peel the leaves as I said, and this really is the faster way to get these flavors. I don't have some fantastic story about how this came to be. I know it isn't an original idea, I did see something similar on YouTube by a woman named Noreen, but that was some years ago. I wanted to come up with my own idea and even maybe a little bit of goulash flavorage or stuffed pepper to add to the dish. So there are a few things, one of which doesn't need to be pointed out at all but I am going to own up to it anyways... It doesn't look perfect. There, I said it. But looks can certainly be deceiving, right? The fact of the matter is, I did not want to change the integrity of the meat. In the original dish, the meat is placed in the cabbage raw and cooked inside... searing off the meatballs would have completely changed the flavor profile, and I have seen it done the same way for Italian Wedding Soup where the meatballs were not seared. Now, this doesn't mean to say it would make it disgusting, it just wouldn't be the correct flavor profile. If you want to sear your meatballs for presentation, by all means, I am just saying that this way is closer to the original flavor. Second thing is that regardless of whether you make them as rolls or soup, this dish tends to get greasy from the fat that comes off of the meat. This is one soup where i don't mind it so much, but if you want to get rid of the fat, let it cool completely and then skim it off when it is solid, but leave some for flavor. Or you can boil your meatballs in water and reduce the amount of fat, but again, it would change the flavor profile. I promise you that this will make you very happy if you are a cabbage roll fanatic like myself. The flavors are rich and hearty, and your belly will be nice and padded by the time you eat what you've served to yourself. The Recipe
Prep time shouldn't take more than 30 minutes tops between the chopping and the making of the meatballs, cook time is about an hour but is more of a set and forget type of thing (You really only have to get up three times to stir). It serves at least 10 people This was just a quick one! I know this was just a quick blog post, but I wanted to get something up so you all didn't think I forgot any of you. My husband just had his surgery not too long ago and I am finding it a struggle to cook for one person since I am a nurturer and like to make people happy with food. Things will even out eventually.
Until then, my friends, I just hope you enjoy the recipes I am able to bring. I have a few that I need to redo from my old blog and such, plus three or four more things already made that I completely forgot about. You'll see :) Until then... Happy eating, happy belly, my foodies. 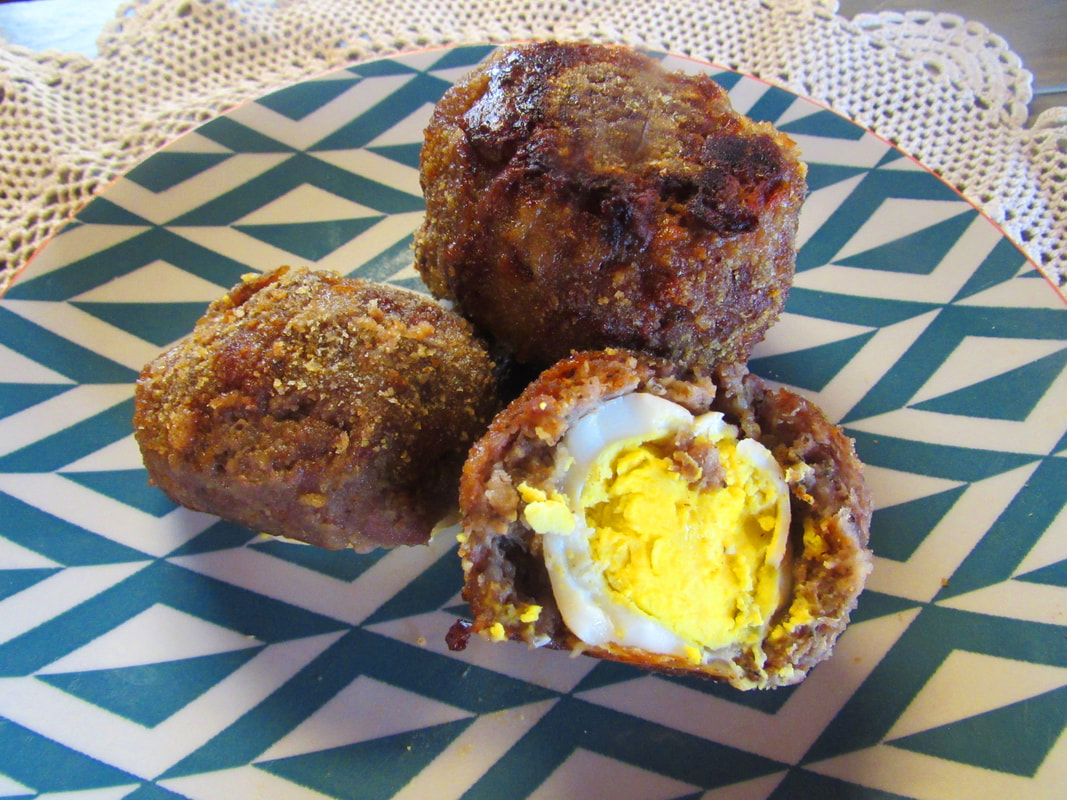 Yum. Hey hey foodies! I know that it has been awhile again, but you should know the deal by now if you are just coming in: I have health issues and such, sometimes I’ll be gone for months. I have some exciting news in any case in that my husband just went through the gastric sleeve surgery, and I am making efforts to stick to healthier grub for the most part. As you know, my blog is not about dieting, although I will put a special diet recipe up every now and then so as not to leave people out. I will still post, but only when the mood strikes me. Today I have for you some Scotch eggs, super easy meal to make and so very yummy. I am doing the baked version, the traditional is deep fried. So what are Scotch eggs? They are boiled eggs wrapped in sausage and dredged in breadcrumbs, then deep fried (or in this case, baked). They were made somewhere in England, not Scotland, around the mid 19th century and was an easy way to carry your lunch around when working. They are now a widely popular street food and pub grub in Great Britain, and in pubs about the world. My first encounter with these puppies was when one of my best friends showed me how her dad makes his, and it is a delicious end result you get because of the ketchup and the saltine crackers he uses in the meat. I have since learned the more traditional route of making them and I shift between two different recipes. They are actually easier than they look and have only a few ingredients. I am going to give you my version of them in a baked state. These are hardly considered diet food but if you can get away without deep frying them, I think it'll be just fine. Recipe
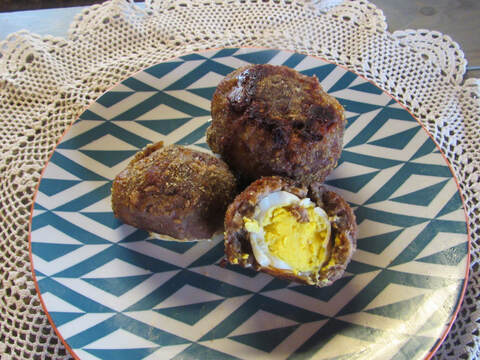 That flour doesn't act as a glue, and there may or may not be cracks in the exterior when one is done baking their delicious Scotch Eggs, but that flour turns the juices into a little bit of a gravy instead, which adds to the creaminess of the egg yolk. I am just going to assume that the yolk turns out a bit runnier in the deep fried version, but I never tried making that. I absolutely recommend that you give this dish a dry, even someone else's recipe, because you are missing out if you don't! What is really cool about just one egg is that you get meal of convenience and it's also pretty dang filling. A little bit about Shawna Shawna and I go way back. We met in high school and chummed it ever since. We were such good friends that we drew pictures together, we drank lots of coffee at the awesome Fourth Coast Cafe, and we love each other as sisters. She and I have been through thick and thin, along with our other friends, Lacey, Inga, Kittie, Dawn, and a few other people. She is our resident Snow White... You know, opens the shutters and sings to the birds and into wells? Anyways, I guess I owe Miss Pegasus for some of the recipes I have learned over the years, including the eggs. I hope my rendition brings you as much joy as hers did. 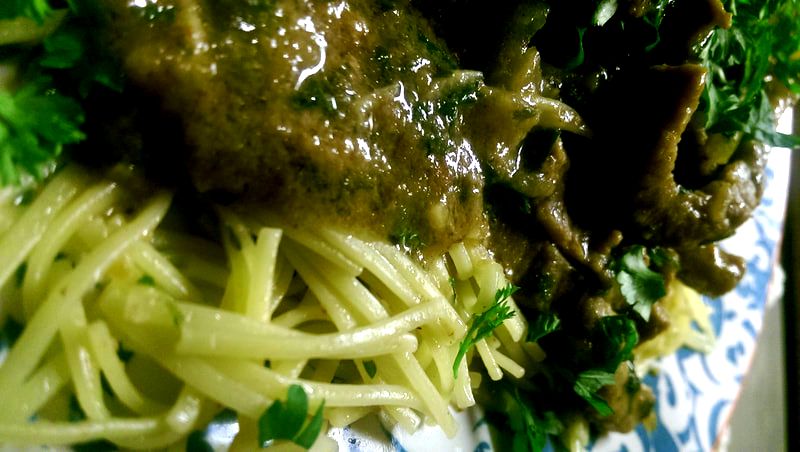 Struggle Meal #2  Have you ever walked into your grandma's house and been greeted by the smell of her home cooking? Beef and vegetable soup steam is wafting in the air and causing you to salivate and think, "Damn, that smells good?" My grandma is not so fond of cooking anymore because of her joints bothering her, but I still associate the smells of her cooking with her house; it is only second after the smell of her cedar chest that makes me happy. My grandma is famous among family and friends for a few particular dishes: the aforementioned soup, bean soup, and beef and noodles. My grandpa runs a business where he does taxes for people, and back in the day, his employees would request the beef and noodles because it is that good. I got lucky in that my mom cooked that for my sisters, my dad, and me when we were younger. Of course, I did not have the same appreciation for it then that I have now because I was picky and loathed gravy... But as I grew older, I began to eat it with joy in my heart. This meal is something grandma just threw together and everyone loved it. My mom told me that my Uncle Steve would eat a whole bag of noodles with the beef and gravy just on his own. It is the kind of food that you make and there are rarely leftovers if at all, which I can tell you is the truth because Bruce ate the hell out of it last night. It is the kind of food that makes me glad for my grandma. She won't be here forever, which is a sad truth nobody really wants to think about... She says so every time I see her, though... And I want to have as many memories as I can have with my sweet, kindhearted, soft spoken, goofball of a grandma. She is one of my favorite people in the world and I am so glad to have her in my life. She means the world to me, and so does her cooking.  Let's talk about why it's a struggle meal. Normally people don't associate steak with struggle... After all, it's a treat, right? The great thing is that steak can be pretty cheap if you get a cut that is normally tough and have less fat or flavor than something like a porterhouse. 1 lb of beef bottom round or eye of round, for instance, is one of the least expensive cuts of beef that you can get at around $4. That is still kind of pricey, right? But think about stretching the meal. My grandma was feeding a family of six with about a lb of the stuff at a time, and there is enough cooked that there COULD be leftovers once they are stretched out. So you have the beef, and you have a can of condensed broth, which is about $1 or so depending on what the label looks like... A bag of egg noodles is around $1, 50 cents worth of onion, 10 cents worth of garlic, pennies worth of the seasonings and flour. My grandma would use two bags of noodles, so tack on another buck and call it good. That makes it less than $8 to feed a family of 6, so just over a buck a plate. That is with inflation. I am going to give you two recipes for this. First will be the original recipe which I highly suggest you make before you try it with my adjustments. Her recipe is simple and quick and mine is a little more complex out of experimentation to develop more flavor notes. My recipe is still cheap, it's only a difference of a few quarters. Grandma's Recipe 1 lb beef bottom or eye of round, thinly sliced into strips ¼ cup flour for dredging 2 TBSP Canola oil 1 small onion, sliced 2-4 cups beef broth/stock 4 cups egg noodles, partially cooked Salt, Pepper, Horseradish, garlic, parsley all to taste
My Revisions 1 lb beef bottom or eye of round, thinly sliced into strips 2 egg whites ½ cup cornstarch 1-2 teaspoons or a big dash of Worcestershire sauce (traditionally, soy sauce is used) Olive Oil 1 medium Onion, chopped ¼ cup bell pepper 2-4 cloves Garlic 1 TBSP Horse radish (Optional) 2-4 cups Beef broth or stock 1 bag egg noodles (Or no yolks) 2 TBSP butter Salt, pepper, celery seed, parsley to taste
 I hope you try both versions! Even though this started off as something thrown together, it is just one of those things that feels like home. It is a gift I wanted to share with you because I felt that it deserved some recognition. Maybe it will give you good feelings and make you think about your own grandma like it does with me. It is savory and the gravy is nice and silky, and it's sort of like eating a bowl of beef and noodle soup but with gravy instead of broth. Like I said, you should try her version first because it's the best. Mine is good too, but it isn't the same as grandma's... With that being said...  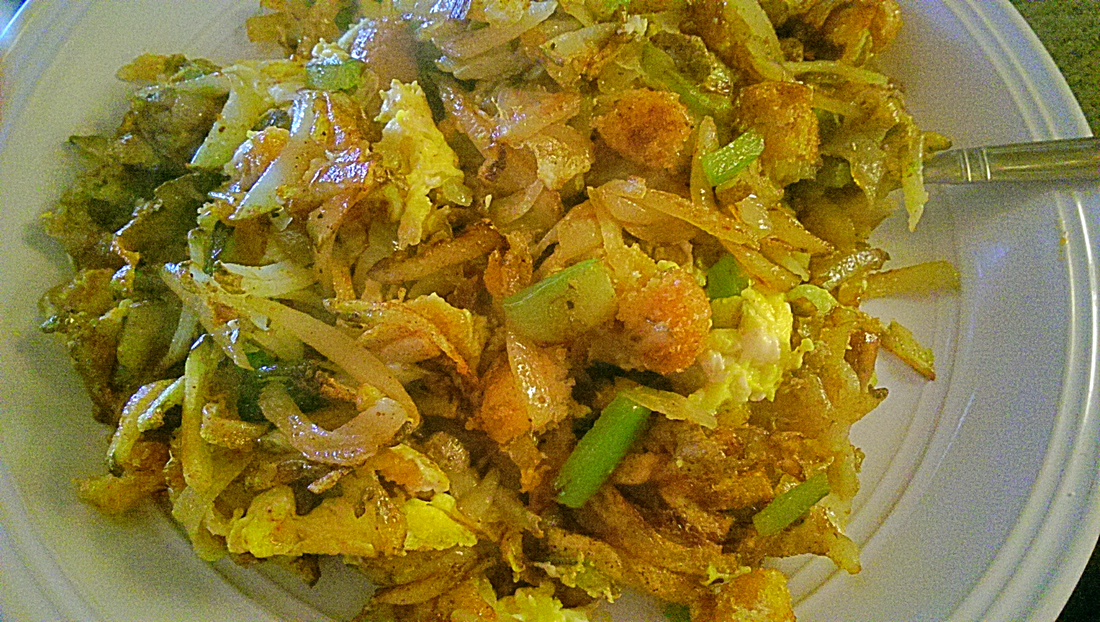 Good morning...  Every time I mention the name "Slumgulean," people give me that puzzled look wondering what in the world I am talking about, and there is a story behind it and how it has been a part of my family for a long time. The answer to the question is that Slumgulean is a struggle meal; a poor man's breakfast/dinner that my grandma used to throw together in order to feed four boys and use up some ingredients that she had readily available. Back in the day, my grandfather worked for Ekrich, delivering their product as a truck driver, and my grandparents would end up with a butt ton of sausage and balogna to eat throughout those years. One of the ways my grandma would fix smoked sausage would be to throw it into her Slumgulean and it would be stretched out with other ingredients that were inexpensive but nice and filling. She would slice the sausage up and fry it along with the taters, add some other ingredients and round it off with some eggs, and boom! My father always spoke fondly of it and how he could never quite get it to taste just like hers... Hell, I can't ever get anything to taste just like my mom's, but that is because it differs from individual to individual, even if you think you added the exact measurement of each ingredient within the recipe. I have had so many variations of this dish and have two or three favorite combinations of what is essentially a "garbage hash." It is not as unique as some might think, really, but it is special enough to me that I decided to write this blog post to honor my dad's original post on the old site, and to honor my grandma because she cooked with love. In fact, my dad had written his blog post right before the final crash of Foodie-zoo, and it would not sit well with me if I didn't say something about it. It is true that my dad had a limited bank of recipes that he cooked and tasted awesome... He made the BEST home made bread, his biscuits were like fluffy little clouds, his beef stew and his chili were to die for, and his breakfasts were awesome. It was one way that him and I bonded, as I had bonded with mom over the stove too. When it came to the hash, he always brought grandma up and how hers was the best. I don't remember the first time that he made it for me... I had always assumed he put his nasty, canned corned beef hash into it... You know, the stuff that looks like canned dog food and smells like it too? Yeah, so you can probably imagine that I wasn't even interested in trying it for the longest time. In fact, I refused to even look at it when I was a kid because of how my mind associated it with the stuff in the can. I believe I was a teenager when I actually began to pay attention to some of the things that he cooked. The first things were his breakfasts, of course, and how he taught me that you do not need milk to make the perfect, soft scrambled egg that was still fluffy and tasty. I watched him throw various things into a pan, and I actually gave myself a chance to smell it and enjoy the aroma. When I tried it, I was in for a pleasant surprise... It was good... I mean, REALLY good. Him and I would talk from over the counter since the kitchen at my mom's house is not that big, and he would tell me stories about grandma or grandpa, adventures in truck driving and such. There was a hilarious story about how grandpa would truck drive and smoke in his sleep, shifting gears with one hand and puffing on an invisible cigarette with the other. My dad would take a clothes pin and stick it between the forefinger and middle finger, and sure enough, Grandpa would "puff" on the clothes pin... We're talking about the round ones, not the ones with springs. I am sure if dad had done that one, there would have been hell to pay. As it was, my grandpa would wake up with the clothes pin between his fingers and he would get mad and cuss. My dad also told stories about my grandma and how she would knock people upside the head with a fireplace poker for cussing in her house. I guess that she was a spitfire while she was alive and she had all the respect in the world for it and for the fact that she was also the sweetest person alive when she wasn't provoked into being irate. I don't remember anything about her, I don't remember ever seeing her or cuddling her, but my dad explained to me that she loved my older sister and me to the moon and back, we were the apples of her eye because she had wanted granddaughters so badly after raising four boys. I wish I had gotten to be around her longer than three years because she had a wealth of things I could have learned from her, like quilting and knitting. I am happy to say that I at least have the legacy of her hash browns, even as insignificant as it may seem to others. It means the world to me to be able to connect with my grandma. So if you are up in heaven listening to my thoughts as I type this blog post out, grandma, know that I am so glad to have a recipe to share with the world because you made one up. 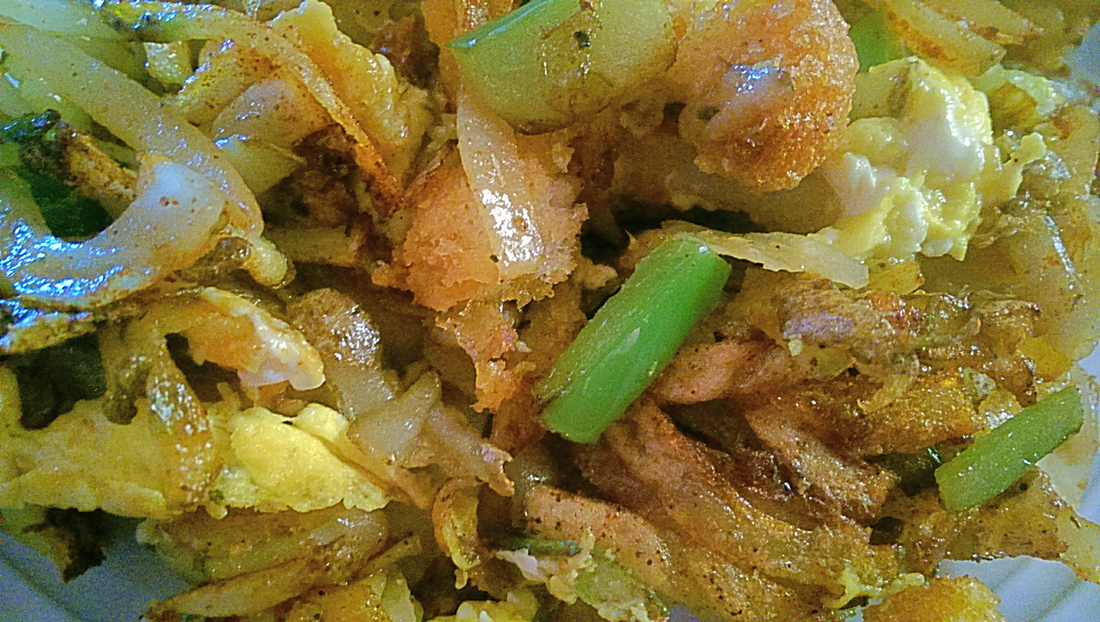 Ingredients per two people: 2 TBSP Canola or Vegetable oil 1 TBSP Butter 6 oz of whatever meat you want (optional, I usually choose bacon if I have it, or breakfast sausage. I have seen dad use ham and smoked sausage before.) 1 potato of any size, shredded, sliced, or diced 1/8 cup of sliced or diced onion 1/8 cup bell pepper (Optional) 1 slice of whole wheat or white bread, torn into small pieces Salt, pepper, red pepper flakes, garlic, rosemary, and paprika all to taste 1 egg. beaten 1 handful (About 1/2 cup) of cheese of choice (Optional)
 I hope that this recipe makes you as happy as it has for three generations of my family. Maybe you will find yourself telling stories while cooking it in the future. It is a small bit of comfort in these days where we are uncertain as to whether we can safely feed our families and be able to put some nutrition in, even if it isn't what a fitness guru would call "healthy eats." The point is to line your belly when you are hungry, and this stuff is super filling and very delicious. Have a good day, my friends and...   This recipe is in collaboration with Capt'n Kenny's Fresh |


| The Ingredients | The Equipment |
| (Plastic Wrap)Shallow dish Two plates (I use paper plates) Meat Mallet (or something that can be used to pound out the pork) Cling Film (Plastic Wrap) Sharp knife (I used my fine edged utility knife) Paper towel or cooling rack Sheet pan Skillet |
The Method
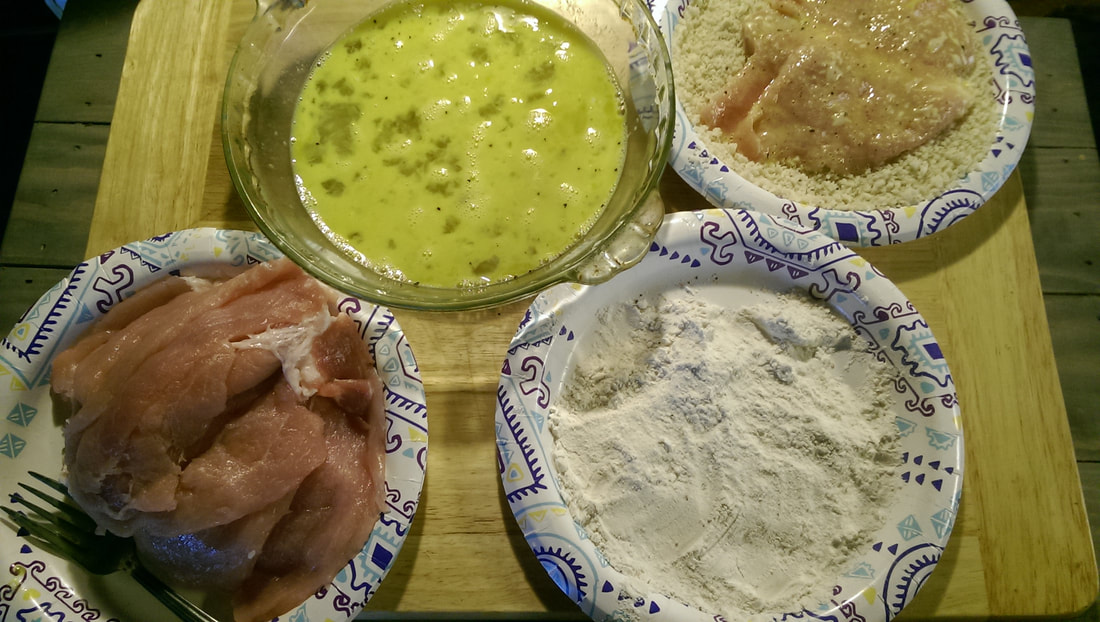
- Trim some of the fat from the meat, but leave a little for flavor. Cut each cutlet in half width wise, then butterfly using a sharp knife.
- Line your counter or work surface with a good amount of the cling film, and then place one piece of pork on that, pressing it flat down. Cover it with another piece of the film.
- Using the mallet, pound each piece out, pulling the mallet gently in the direction of the closest edge to help distribute the mass. You want your cutlets to be as thin as you can get it without tearing holes or making it see through. I'd say you want it between 1 and 2 MM thick for best results, set those aside.
- Set up your breading station, eggs in the shallow dish, flour on one plate, bread crumbs on another. Be sure to season the meat, the eggs, and the flour. Dredge in flour first, then the egg, and then the bread crumbs. Get them all breaded and let them sit for a few minutes for the breading to adhere better to the meat.
- In the skillet, heat up your oil until you see it shimmering. If you aren't sure it's ready, use a chopstick or the handle of a wooden spoon; if you see little bubbles foaming around it, the oil is ready.
- Fry in batches of two (or one if you have a smaller skillet) until each side is golden brown - it doesn't take long at all and you will smell it if the one side gets too dark. Place on rack or towel to drain. Toss a little more salt on it to finish seasoning.
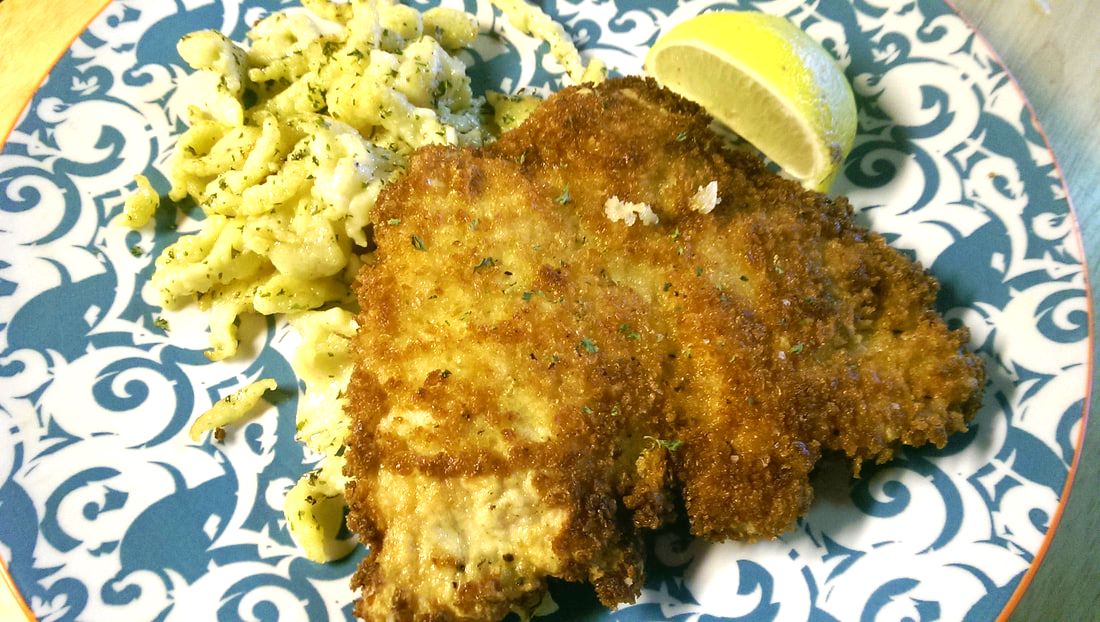
- Serve with lemon and choice of sides.
The Spaetzel
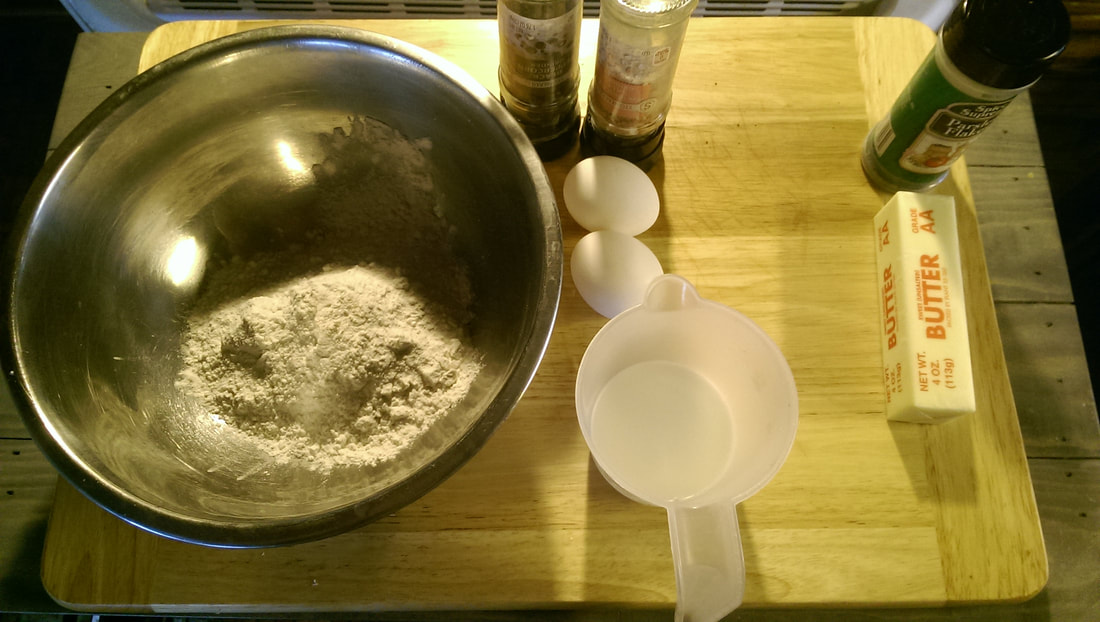
| The Ingredients
| The Equipment Mixing bowl Fork Spider strainer or slotted spoon Potato ricer with large holes, or cheese grater with large holes, or spaetzel maker Cooking spray Large saucier Medium sauté pan |
The Method
- Mix the flour and seasonings in the bowl.
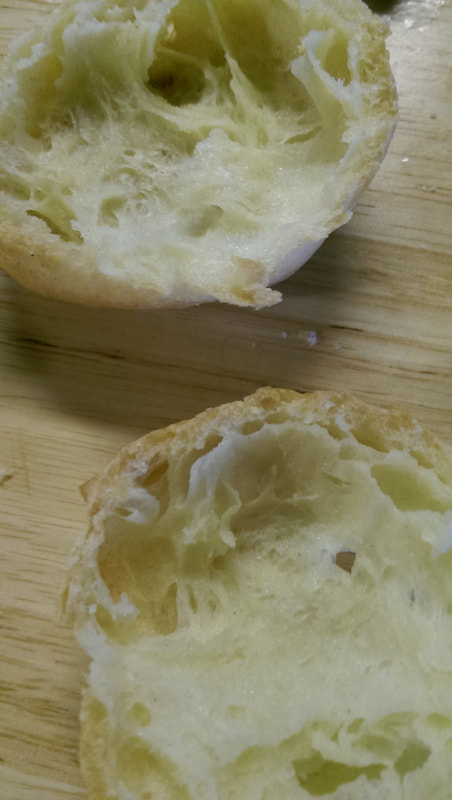
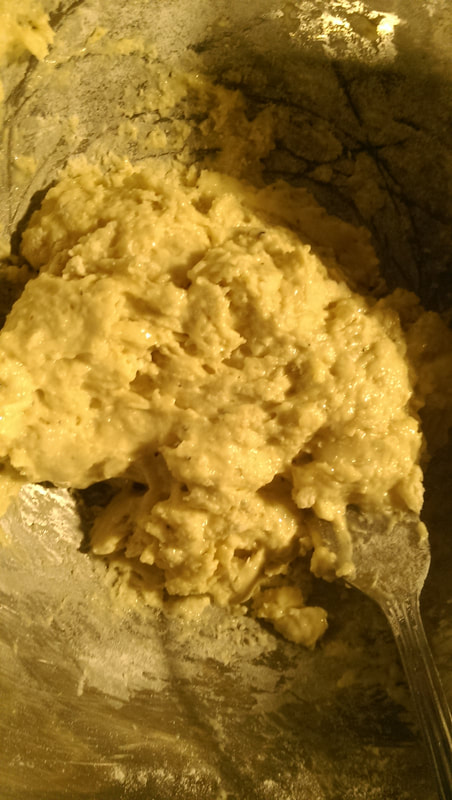
- Beat eggs into the milk, then pour into the dry ingredients. Use a fork or your fingers to mix the dough, but do not overwork the mixture. You will get a sticky dough, do not be alarmed if it looks like the picture above.
- Heat your water, and I suggest salting it, until simmering.
- Have your sauté pan at the ready with half of the butter at a lower heat so the butter doesn't burn.
- This is where I made a huge mistake! Because the dough is so sticky, it clogged up my crank shredder and not all of it made it into the pot! Spray whatever you are using to help prevent sticking, and then just grate or press right over the pot in batches.
- As soon as those suckers are floating, they are ready to pull from the water. It happens really fast, so be at the ready with your spider.
- Toss the dumplin's into the saute pan until you have all of them in there, then turn up the heat and sautee them to get some color and a little crunch. Trust me when I tell you that the crunchy spaetzel is so very yummy!
- Add the rest of the butter, lemon juice, and the parsley, and toss until butter is melted. Serve and enjoy!
Eat, Drink, and be Merry!
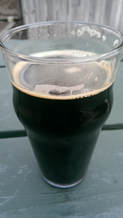
I served mine with green beans too, but that was the vegetable on hand. It's like I stated, it can be served with kraut, and it is paired well with a German stout. This month is a great month for such a meal, but don't wait for Oktoberfest to come for you to make this dish because you can make it whenever you want. That is the greatest beauty of running your own kitchen! And please, please, please don't forget the squeeze of lemon. It is what makes it pop, it brightens the flavor!
I absolutely adore the simplicity of each part of the meal. The buttery flavor of the dumplings after they are sautéed? Yes, yes, all the yes. I promise you that it might look daunting, but it really is super easy once you have everything ready to cook! It is also quite worth the effort.
I hope that this brings you as much joy as it did me, and I hope that you enjoy the recipes.


This post has a very special place in my heart. When I was a little girl, our family situation wasn’t the best; food was always provided even if it wasn’t ideal, and my dad wasn’t an easy man to live with. The good thing about memories is that, though there are plenty of bad ones to be had, there are always good ones… special ones.
It’s been established that dad didn’t do very well with some of his cooking, and I say that in the most endearing sense. Not all of his food was bad. He was really great at making an American breakfast (Pancakes, bacon and/or sausage, and eggs), he could also make a mean campfire chili or beef stew, and he made what our family calls Slumgolean Hash (which I can do a recipe for at another time.) But this blog post is not about any of those things.
It’s been established that dad didn’t do very well with some of his cooking, and I say that in the most endearing sense. Not all of his food was bad. He was really great at making an American breakfast (Pancakes, bacon and/or sausage, and eggs), he could also make a mean campfire chili or beef stew, and he made what our family calls Slumgolean Hash (which I can do a recipe for at another time.) But this blog post is not about any of those things.

This is about a beautiful memory that takes me back to one of the happier times we shared with dad. He made monkey bread from scratch and put a lot of love into it. It was like eating a cloud that was laced with just the right amount of sugar and cinnamon, the right amount of sticky glaze that was too yummy to use a napkin on. My dad made the best monkey bread I have ever had the pleasure of tasting.
I remember how proud he was of the bread and how he laughed with his joy at how his children were delighted in this pastry. It was something we gathered around just one time that I can remember, but it did define part of my childhood with a good and beautiful memory.
I have had other monkey bread throughout the years; GOOD monkey bread, at that, but nothing that has ever taken me back to that memory. It took hearing the sound of my niece, Al’s daughter, to call out, “Monkey bread” to spark that memory full on, though Al is the one who made it.

As soon as the idea popped into my head, I opened up my cook books and began to look for the perfect base recipe to work off of. I needed an idea on what ingredients were involved and how much to put in. It happened to be in my Better Homes and Gardens cook book (if you do not have that one, you should get one as it is a legacy). It wasn’t even a monkey bread recipe, but rather, a cinnamon roll recipe.
My brain went into excitement mode for the things I could take out and replace, or add to it to make it better. I want to be taken back to that first bite, to hearing my father laugh the way he used to, because it was to him who I owe my cooking passion.
Fair warning, this is a time consuming recipe but totally worth the effort. This is also not diet food, though you can use sweeteners to lower the amount of sugar you use. Just follow the conversions as needed, usually the sweetener bags will have them. They are also widely available on the web.
The Recipe
Ingredients
Variation #1 with an adult twist
Icing
Variation #2, Blood Orange Cranberry
1/3 cup granulated sugar
1 Tablespoon or so Blood Orange zest
1 teaspoon fresh (grated with micro plane) or ground ginger
¼ cup softened, unsalted butter
½ cup blood orange juice soaked dried cranberries
2 cups confectioner’s sugar
A dash of ground ginger
1-2 Tablespoons Blood Orange Juice
(You can use any orange if you are not fond of blood oranges)
Equipment
Ingredients
- Base
- 4 ¼ - 4 ¾ cups flour
- 1 packet dry active yeast
- 1 cup milk
- 1 cup cooked potatoes, mashed
- 1/3 cup unsalted butter, cut up
- 1/3 cup granulated sugar
- 1 teaspoon salt
- 2 eggs
Variation #1 with an adult twist
- ½ cup packed brown sugar
- 1 Tablespoon cinnamon
- ¼ cup softened, unsalted butter
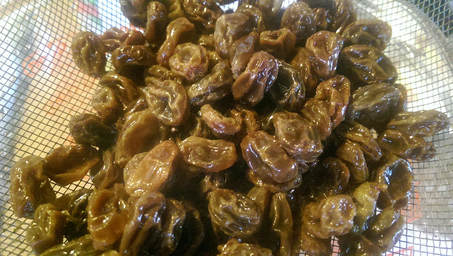
- ½-1 cup rum soaked raisins (optional for either the rum or the raisins)
Icing
- 2 cups confectioner’s sugar
- 1-2 tablespoons rum (milk if you don’t want rum) - I used half and half
Variation #2, Blood Orange Cranberry
1/3 cup granulated sugar
1 Tablespoon or so Blood Orange zest
1 teaspoon fresh (grated with micro plane) or ground ginger
¼ cup softened, unsalted butter
½ cup blood orange juice soaked dried cranberries
2 cups confectioner’s sugar
A dash of ground ginger
1-2 Tablespoons Blood Orange Juice
(You can use any orange if you are not fond of blood oranges)
Equipment
- Cooking Spray
- Large mixing bowl
- Sauce Pan
- Measuring cup/spoons
- Electric Mixer
- Well greased bundt pan
- Roller
- Sheet pan
- Sharp knife or bench scraper
- Cutting board if using a knife
- Plastic wrap or damp tea towel, parchment paper
Method
- In your mixing bowl, combine the yeast and 1 ½ cups flour and set aside. Meanwhile, heat up the milk, potato, and butter, granulated sugar, and salt in the sauce pan until 120-130 degrees Fahrenheit and the butter is almost melted. Add this to the flour mixture as well as the eggs, beating with an electric beater on low speed for about 30 seconds, then on high for another 3 minutes. Stir in as much of the rest of the flour as you can.
- Turn dough out onto a lightly floured surface and knead in whatever flour you couldn’t stir in for a moderately soft dough. You want this dough to be smooth and elastic by the time you are through kneading. It takes about 3 to 5 minutes to reach the right consistency, so you will get a little arm work out! Shape the dough into a ball, and I suggest you rub oil on your hands and then pat that on the dough ball and then using the mixing bowl and a damp tea towel or some plastic wrap to cover the bowl. Set this aside in a warm place and let it rise until dough doubles in size.
- Get your aggression out on the dough, punch that sucker down and then turn out onto a lightly floured surface. If you haven’t already greased your bundt pan, now is the time to do so. If you have a bundt pan with the ridges on it, it’s especially important to lubricate that pan so the bread doesn’t get stuck in any of the nooks and crannies. If not, go back to tending to the dough. Cut your dough into four equal lumps. Set aside three of the sections (back into the bowl they go), then roll the first lump into a rectangle, approximately ¼ inch thick, transfer to the sheet pan, place parchment on top and then repeat the same step with each of the remaining lumps. Preheat oven to 375(F).
- Mix the filling (V. 1: Brown Sugar and cinnamon) (V. 2: Granulated sugar, ginger, and orange zest). Spread the soft butter on each layer, then sprinkle either your raisins(v. 1) or your cranberries (v. 2), placing one dough layer on top of the other, then roll into a spiral and cut into rolls. Then cut the rolls into irregular nuggets and build those up in the bundt pan. Cover and let rise until doubled in size or nearly.
- Make your glaze (V. 1: Rum or milk and powdered sugar)(V. 2: Orange Juice, ginger, orange zest, and powdered sugar).
- Bake for 30-45 minutes or until dough is done in the thickest parts of the bread. Cool in pan for 10 minutes, turn out onto a wire rack, and then pour your glazes over the top and serve warm.
Prep: 45-60 minutes
Rise: 75 min
Rest: 10 min
Cook time: 30-45 min
Serving: 4 pieces
Yield: Approx. 48 nuggets
Source for Base Recipe: Better Homes and Gardens New Cookbook 16th Edition Page 110: Potato Cinnamon Rolls

Serving this bread warm is the best way to eat it, and you don’t need a knife and fork to do so. You can pick at the nuggets like a monkey would pick.
I chose to make the adultified version, and just so you know? The rum icing is A-Okay! I don’t think I added enough salt to the dough itself, but that is my error, not the recipe. It was still fluffy but dense like raisin bread, as opposed to your traditional cinnamon bun.
I adore monkey bread and the memories it brings. Share this bread with your children (or at least the rumless variety) and watch their faces light up with joy. Maybe you could even have your little ones help you out with making the bread so you can create memories of your own. If you don’t have kids, you can still make it and have fun in the process. The point is, you should do it because you want to and to experience the joy that it can bring.
For me, I will forever cherish the stolen moments that are branded into my memory that can come flying back into my head at the sound of its name, or the flavor of the dish. I hope that I do justice to one of my dad’s very favorite things to make! And with that I say...

Marie Barone isn't the only one...
I have been holding onto a secret for quite some time… or rather, secret recipe.
Did you ever watch the show, Everybody Loves Raymond? Marie Barone was one of my favorite characters. I mean, she could cook some beautiful foods, though she was very secretive of this. One recipe in particular got my gears moving and my curiosity on high alert. It was steak pizzaiola, a name that I memorized and thought about quite a bit.
Carne Pizzaiola means “meat in pizza style,” and is mostly made with cheaper cuts of beef, but can be other meats such as chicken. Basically, it is a wide range of combinations that you can use. The best way to put it is that the meat is a replacement for pizza crust. I have no idea on where in Italy this dish was first made, or even when, but I thank the Italians for such lovely fare.
I decided to look a recipe up and you’re probably going to giggle at where I found it at… I hijacked Martha Stewart’s recipe for her easier version (she has both that and traditional). I made it the first time several years ago, but right away I decided to change what I saw because her recipe seemed so… well… herbless? She was using round steak, which is quite lacking of flavor to begin with, and there wasn’t much in the way of even Oregano. I don’t even remember if she used it or not.
I thought about how I like my pizza in general and went for it. My family gobbled it up, including my very picky dad who didn’t like flavor much (aka, he had a bland pallet, the poor man). Guess what? It’s actually very easy to make, and you don’t even have to tenderize the meat because it’s a slow cooked, one pot/pan meal!
The Recipe
| Ingredients
| Equipment
|
The Method
- After you have prepped your ingredients, (vocabulary of the day, Mise En Place – Everything in place), make sure your pan is nice and hot and then add your olive oil.
- Once the olive oil is shimmering, then you add your steak. Sear for a few minutes (4-5) until you get a nice crust. This gives it some good flavor.
- Remove the steak to a big plate along with juices, and do one of the following…
- Lower the heat some, add your onions and diced peppers, stirring until onions become translucent
- Add your garlic and sautee with the veggies for a few moments to get the raw taste out.
- Drop in your tomato paste and stir. When it starts to smell sweet, it’s ready.
- Pour in the tomatoes, juice and all, and water/beef stock(as necessary), stirring until mixed.
- Add a small amount of salt and pepper
- Put the steak and juices back into the skillet and cover with the sauce. Then cover pan and simmer on low heat for 2 hours, checking periodically to make sure it doesn’t scald. About 1 hr 45 min into this, add your herbs.
- Once the steak is done (it should be fork tender at this point) add the cheese on top of each steak, recover and let that melt.
- Serve with your choice of sides
Totally optional but worth it, refined method:
- For Electric Stove: Before you even start cooking the beef, place whole pepper into the oven at 425F for 20-30 minutes until skin is charred. For Gas Stove: You can char the skin using one of your burners while your beef is cooking, and once charred, place into a bowl and loosely cover with cling film or the bowl’s cover. Set aside to let the skin loosen.
- Turn the heat in the pan down, add some more olive oil, toss in your skillet, add salt to draw moisture out and then keep stirring them every minute or so. Do not leave the stove, not even to answer your phone, as your onions can and will burn if you do not pay attention to them. In about 20 minutes or so, turn the skillet off and let the residual heat finish caramelizing the onions.
- Pull your pepper out of the bowl, and using a paper towel or tea towel, remove the skin, discard the seeds and membranes. DO NOT remove skin with water, that takes flavor away and we don’t want that.
- Turn the heat back on to your pan, add the peppers to the onions, along with garlic and stir until the garlic is cooked a little.
- Follow steps 3-8 from the easy method.
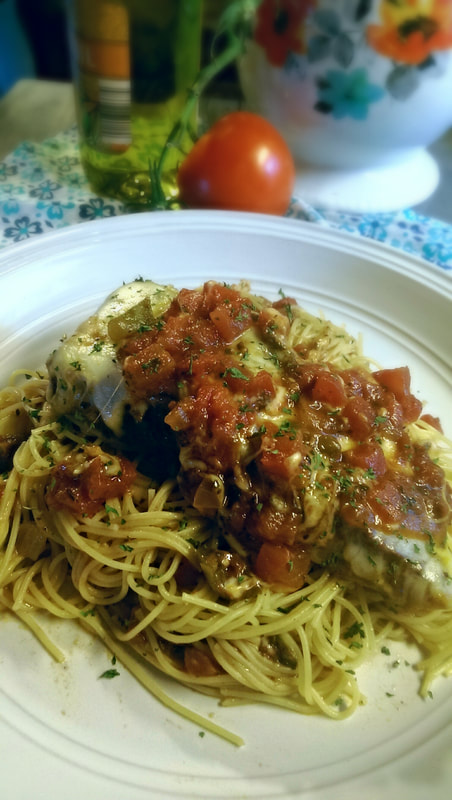
Serve with pasta or bread if desired!
Note: I omitted the paste because that is how I like the sauce, so it might look different on my plate than it will look on yours if you use the paste.
| Prep Time: 10-45 min Cook Time: 2-3 Hours Serves 4-6 Nutrition facts for 6 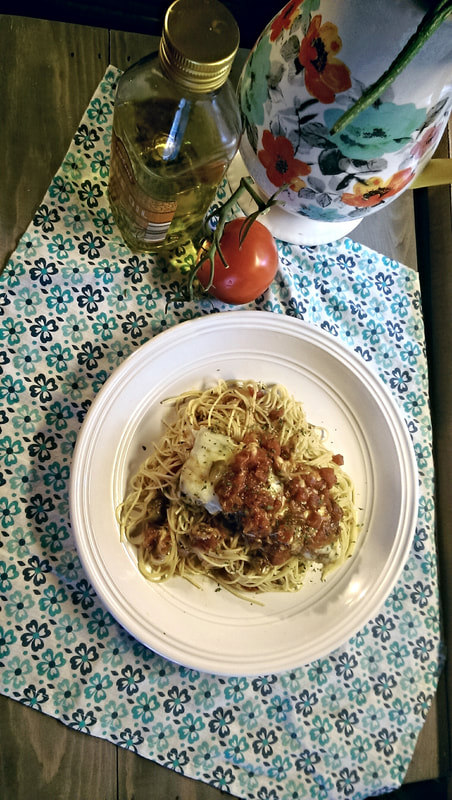 | Nutrition Facts Servings: 6 Amount per serving Calories 318 % Daily Value* Total Fat 16.3g21% Saturated Fat 5.1g25% Cholesterol 65mg22% Sodium 257mg11% Total Carbohydrate 10.1g4% Dietary Fiber 2.3g8% Total Sugars 5.9g Protein 33.2g Vitamin D 0mcg0% Calcium 227mg17% Iron 2mg13% Potassium 720mg15% *The % Daily Value (DV) tells you how much a nutrient in a food serving contributes to a daily diet. 2,000 calorie a day is used for general nutrition advice. |
The best part of this recipe is that you can play with it, adding what you like on pizza. If you are so inclined to add mushrooms, or other meats, or what have you. I like to keep it simple, closer to traditional. If you use a different meat, your cooking time might change, Chicken breast is better added back into the pan close to the end of the sauce cooking so it doesn’t dry up, chicken thigh would probably work better.
Funny Story...
Funny story about a different protein that I used once for this recipe… My dad absolutely loathed venison. He swore up and down that he would be able to tell if it was deer or not. My sister asked me to cook dinner for a Christmas gathering, perhaps a few years back, knowing that dad would throw a fit if he knew it was Bambi in the pan and not Heifer. Challenge accepted. I made one of my best batches of pizzaiola that evening, making sure I was there before everyone else so dad wouldn’t see the venison before it was cooked. It turned out so tender and delicious that dad ate seconds… I had fooled him into eating deer meat!
When I told him a year or so later that we fed him Bambi, he said, “I knew it all along,” in that tone of voice a kid gets when they find out they’ve been duped.
And I laughed and laughed. (I kid)
With that all being said, I bid you good day and:
When I told him a year or so later that we fed him Bambi, he said, “I knew it all along,” in that tone of voice a kid gets when they find out they’ve been duped.
And I laughed and laughed. (I kid)
With that all being said, I bid you good day and:


The Eccentric Foodie
Food Tip
Cooking bacon in the oven is the easiest way.
Recipes
These are various recipes that either I created, or I found and adjusted to what I thought would be awesome or even healthier.
Archives
March 2020
September 2019
July 2019
February 2019
October 2018
September 2018
August 2018
May 2018
April 2018
March 2018
November 2017
October 2017
September 2017
August 2017
Categories
All
Americana
Bacon
Breads
Breakfast
Brunch
Budget
Canadian
Cheese
Christmas
Comfort Food
Dessert
Dietary Needs
Dinner
Easy
Fruit
German
Gluten Free
Grains
Historic
Holiday
Hunagarian
Italian
Life
Meats
Native American
Oktoberfest
Pasta
Polish
Poor Man's Meal
Potatoes
Reality
Scottish
Seafood
Sides
Snack
Soul Food
Soup
Stewed
Struggle
Sweet
Test Recipe
Thanksgiving
Veggies
YouTuber
 RSS Feed
