
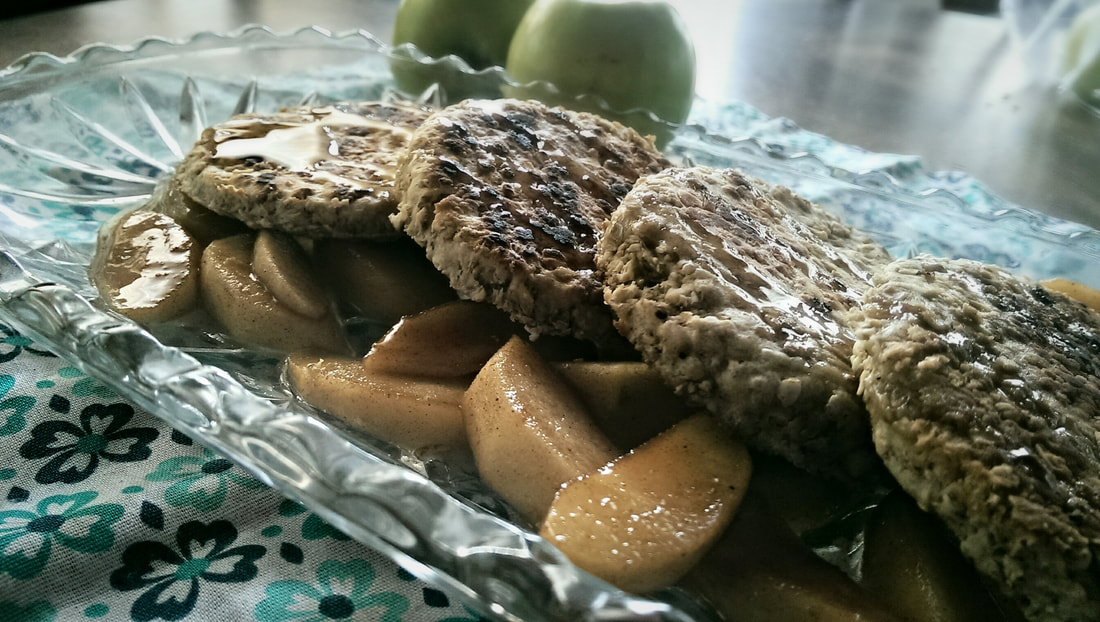
 I had a really wonderful friend in a woman I met through one of my ex-boyfriends... She was a kindred spirit to me and even when him and I were moving away from each other in our relationship, she continued to stick by me as a supportive friend. I grew to love her like she was my big sister, and she did so much to enrich my life. Sara not only gave me comfort during hard times, but she did it while suffering through her own demons. Sara took her own life in November... It's now August in the next year, and I am just now able to type a post like this, and even now, I feel my eyes fill with tears in remembrance of my dear friend. I want to honor her with this blog post because she always encouraged me to play with food. It was one of the things we connected over, cooking and working with recipes. She absolutely loved medieval things. She was a member of SCA and attended an annual event called Pennsic, which is a giant, Ren Faire, in essence. She wanted me to help her with food for a party she was throwing for her SCA friends, which included my boyfriend(at the time), and a handful of people I hadn't met yet. She wanted help with stew and asked me to come up with a medieval food to make that people could nibble upon... I chose Scottish Oat Cakes, and she was right there with me as I embarked on making this cool, historical food I had never tried before. 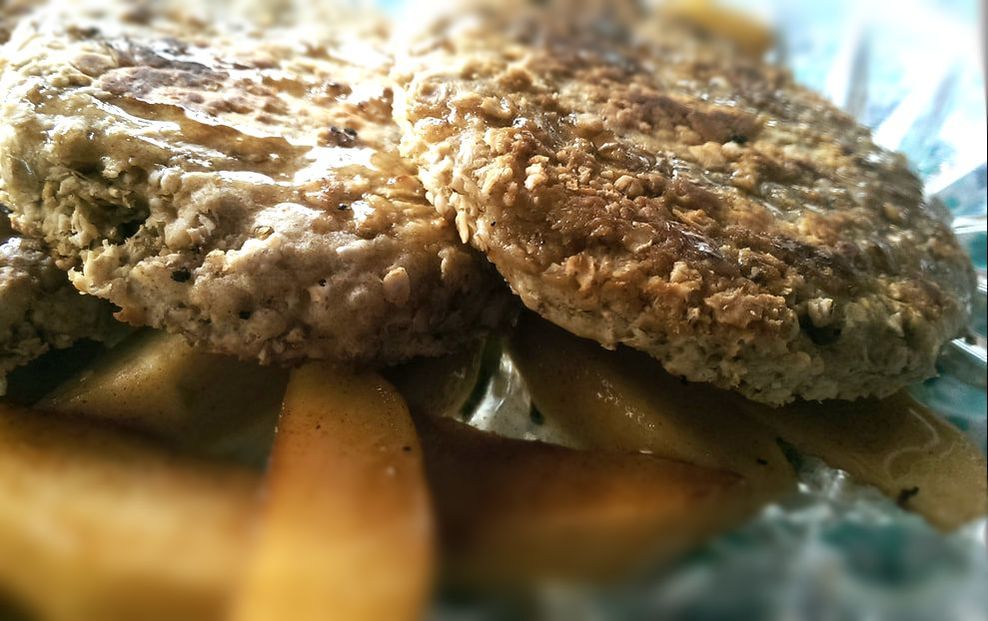 I made a sweet version that resembled drop biscuits, so I am not sure whether they were accurate or not, but they did turn out delicious and seemed to go over okay (as far as I remember). I decided that I would try this again, only I would try to be closer to the traditional recipe. It is said that Scottish Oat cakes have been around since at least 43 AD, and they are a flatbread made with oat, oat flour, fat, water, salt, and leavener. They are like dense crackers or biscuits and are quite filling and can be served sweet or savory. ( Click Here for Oat Cake Wiki ) ( New York Times Article: FARE OF THE COUNTRY ) For more information on the history of the oat cake, I suggest the NYT article, but the Wiki is the closest I could find to an encyclopedia entry *cringe* and I do not claim any accuracy to said Wiki. I ended up having to adapt my recipe from two other recipes, I will do my best to give you original ingredients along with my substitutions. THE RECIPE
THE METHODIf you are going to bake them.... Preheat your oven to 375F/190C... In your large mixing bowl... Add all of your dry ingredients and mix them. Drizzle in your rendered fat (I used butter, but the best substitute is bacon grease)... Mix well until it forms a thick paste... Add a little bit of water at a time until mixture becomes a ball... Turn out onto your work surface and toss dry oats onto board and onto dough... Knead dough, adding oats as needed until your dough is no longer sticky. Split dough in half, roll each half (at a time) to about 1/4 inch thick. Cut into rounds (or you can cut into squares if you like)... Bake for 45 minutes or until brown, or pan fry in a small amount of fat for 3 minutes each side on medium to medium high heat.  One of my favorite pictures of Sara... This was from before I met her, and I borrowed it from her timeline. I do not claim credit. I made these today instead of waiting around to do it because I found myself thinking of Briney (Sara) and the time I spent in her company. They tasted pretty close to what I had made, but without sugar, and it kind of brought me back to the day we bonded over oatcakes and venison stew. I miss her so very much and I hope that she is at peace now... I know that she didn't have it easy in life, but she was and will always be in my heart as an inspiration.
Thank you for being my friend, Sara. Love, Kimmie 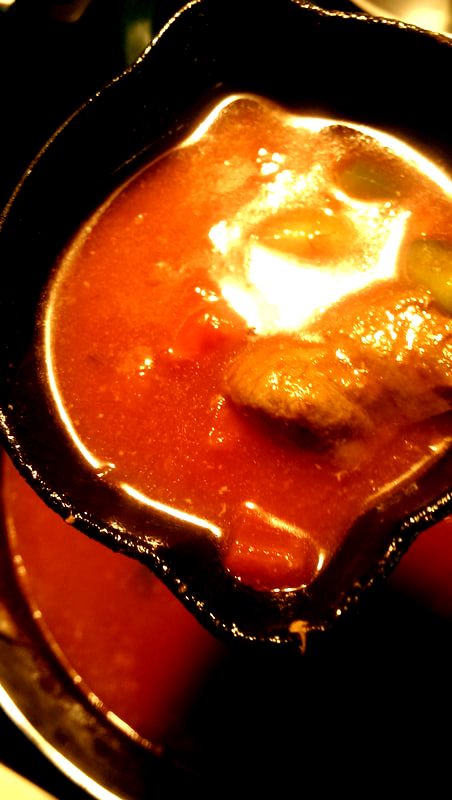 One of the foods that I ate a lot when I grew up was American Goulash. This is one comfort food I still enjoy to this day. I remember eating this a lot when my mom was home to cook it, as my dad did not often dabble in this dish. Mom could always get me to eat it even with me being a picky eater, even when we seemed to eat it at least once a week because it is cheap and easy to throw together. I can't get Bruce to eat it (he got burnt out on it in his childhood), but I cook it for myself at least once a month or so, especially when I feel like I need something comforting. There are a few ways to make the dish... Elbow noodles, ground beef, and a tomato base. You'd be surprised to know that it isn't that far from the traditional, Hungarian goulash, which is beef pieces, tomato base, and either dumplings (like spaetzle noodles or formed dumplings) or potatoes. The American version is sometimes called "American Chopped Suey," which is because you throw everything together in one pot, and there are several different ways I have had American Goulash. My grandmother, my dad's mother, used to make hers with tomato soup base... It is not really my favorite, though it isn't horrible... I just don't like the sweetness that tomato soup lends to the dish. Some people use spaghetti sauce, which makes it taste like spaghetti and might as well be spaghetti to me... My mother makes my favorite version of American Goulash, using tomato juice or vegetable juice. My sister always looked forward to drinking a glass of the juice when mom would open a can up. Lastly, when I lived in Kentucky, I used to go over to my boyfriend's (at the time) parents' house, and they would make a cheesy version that surprised me. Sometimes I make it that way because I miss them and/or Kentucky every once in awhile, and this is the version I CAN get my hubby to eat. However, the moment I tasted the more traditional, Hungarian Goulash? I rarely ever eat American Goulash anymore. The Hungarian Goulash is my very favorite because it is more hearty and the stewed beef has a nicer mouthfeel, plus the depth of flavor is so good! I do eat it with pasta, but that is the only diversion I make from traditional ingredients since I am only making it for myself. Whether you enjoy the traditional version or the Americanized, this dish is worth trying at least once in your life. If you haven't yet, I suggest you try both types, though I will tell you that the best kind is definitely the traditional. This post is going to include the recipe I use for the more traditional, but I will include a few American versions in paragraph style. 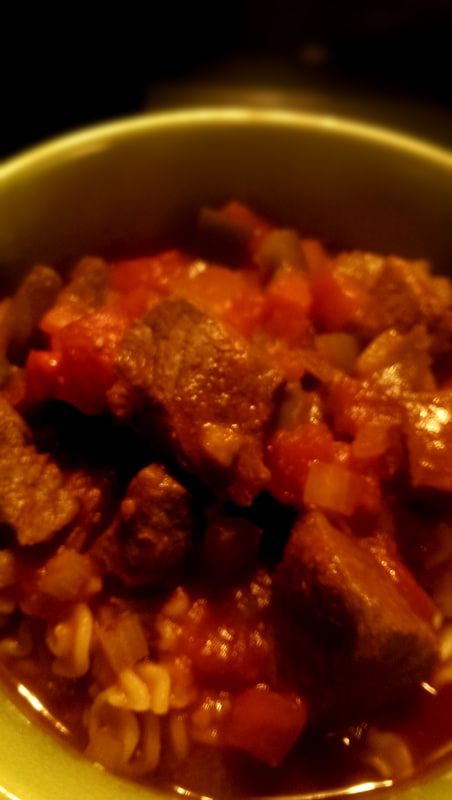 THE RECIPE
THE METHODSeason your beef well with some of the salt, pepper, and paprika, onion powder, and garlic powder. Heat your pot to medium high, drizzle some oil in the bottom, and brown beef cubes. Remove from pot. Lower heat to medium, add onions and stir frequently. When onions are caramelized, add green pepper, then garlic, and the rest of your paprika and the caraway seeds. Once the peppers have softened, add the meat and the juices from that back into the pot. Add the rest of the ingredients, and bring to a simmer. Cook for at least 45 minutes. Serve with dumplings (added toward the end of cooking, time varies based on size of dumpling), over boiled, cubed and boiled potatoes, or pasta (This is not traditional). 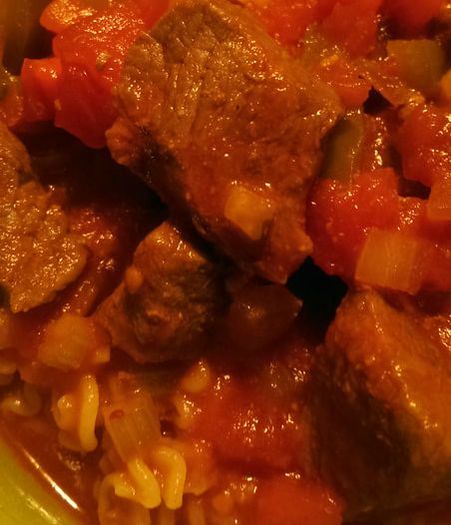 ALTERNATIVESThese all start with browning ground beef with onion and seasonings.
Please, I urge you to try the traditional at one point in your life, even if you have never had a fondness for goulash. It is such a nice, comforting dish!
With that being said, I had fun writing this post! If you have any requests on any recipes, or would like to collaborate with me, please contact me and I will see if I can get it up or not! I am also open to sponsorship if anyone, business or otherwise, wishes to purchase the ingredients for a recipe, please do let me know as well. I look forward to the challenge! Much Love, Kimmie 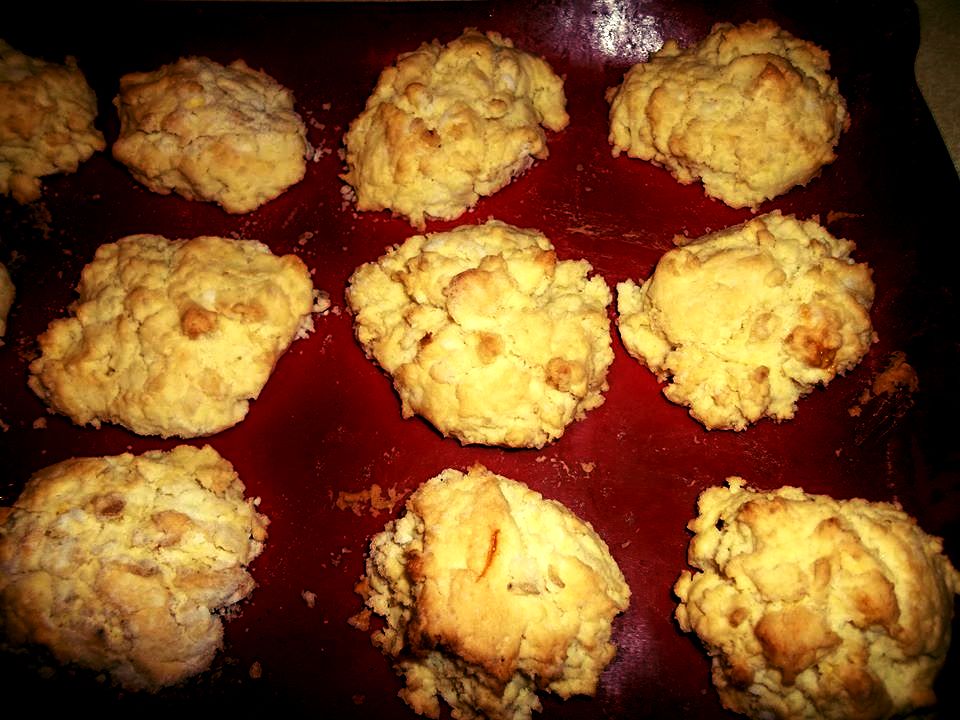
Warning: This recipe is buttery! This is not diet food. Proceed with full disclosure!
I promised you biscuits to go with your gravy, right? Keep in mind that sausage gravy 'n' biscuits isn't exactly for those who are watching their waistlines... But you are missing out when you ignore a fluffy biscuit, and the gravy that goes with it. This recipe is something I use for dumplings as well. I like my dumplings to be fluffy, like a cloud. There is an art to making both cut biscuits and drop biscuits... The butter (or shortening if you must use that), the amount of flour you use, the seasoning, and the amount of time you work your dough/batter. But the great thing about the drop biscuits is that you will know just by looking at it if it is too wet or too dry, if you did just the right amount of mixing, etc. It's more of a "fritter" style, though not fried, than the flaky style. I don't have this awesome, nostalgic story to tell you about what made me like drop biscuits... I just like them. I like how soft and fluffy they are, and how they are the perfect vessel to hold sauces and gravies as there are so much more nooks and crannies to speak of. That is not to say that I dislike the flaky style biscuit, those have advantages too! But I am saving that recipe for another time. This one will have a few alternatives to flour, milk, and butter, for those of you on gluten free, dairy free, or vegan diets! First, the recipe. 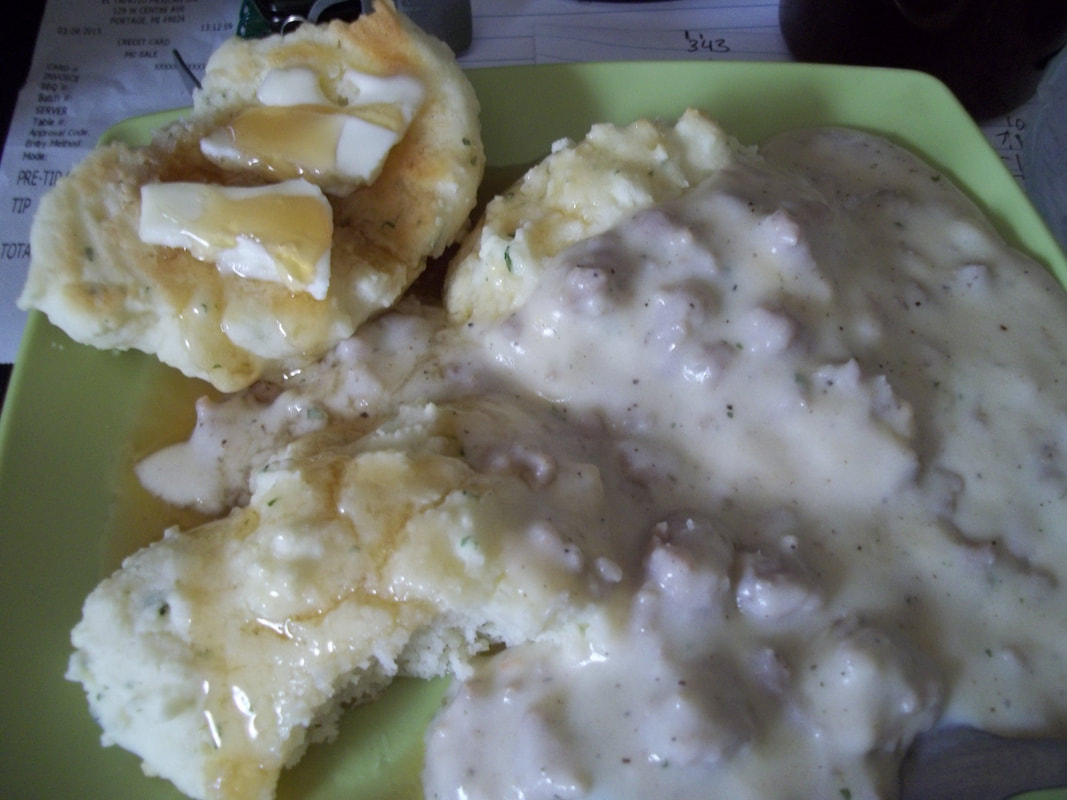
The Recipe
The Method
Preheat your oven to...
350 F or 175 C
In your mixing bowl...
You can sift your dry ingredients in if you desire, but you can just put them in.
Add the melted butter...
Cut it in with a fork or pastry cutter. It should look like wet sand when you are through with that.
Add half of your milk all at once...
Mix and keep adding until you have a thick batter that hold's it's shape when you have it on a fork or spoon. Do not worry about lumps, lumps are good. You do not want to over-mix or your biscuits will be chewy!
Spoon into 1/4 cup- 1/2 cup lumps onto your sheet pan (Greased if needed)...
Bake for 12-15 minutes or until you see nice brown bits on the tops!
Substitutes and Add ons!
The reason I don't have a set amount of milk or flour is that sometimes it varies on how much of each you need. This recipe is super forgiving unless you overmix the dough! Just be careful not to mix too much if you have to add flour or milk.
This recipe is super easy and versatile, which is what I absolutely love about it. They taste really awesome in a stew, as a dessert, or used for sausage gravy. I hope you enjoy as I do. Let me know what you think! Hit that "Like" button, share it, love it, eat it. Thank you, foodie friends!
Much Love, Kimmie P.S. See that "Yum" button? If you have a Yummly account, please do tap that button! 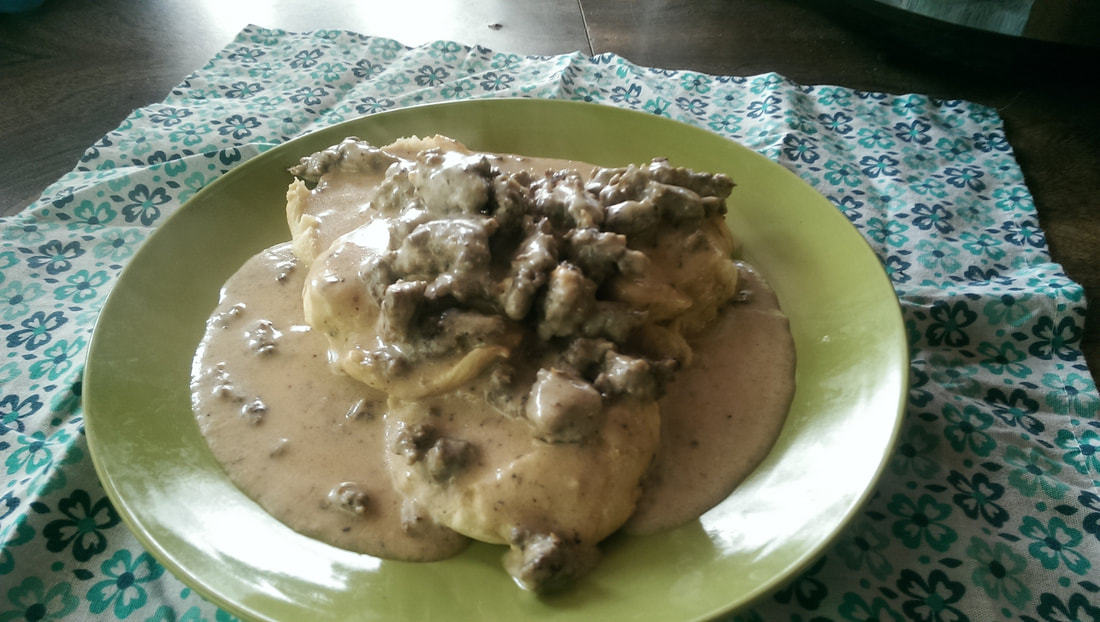
Gravy... My old foe. I hated gravy when I was a kid... It didn't matter that it was sausage gravy, or brown gravy; it didn't matter if the gravy was in a stew or on a piece of bread... I found gravy to be the most foul of all beasts. I remember my dad's face at what happened when he made me eat some on my mashed potatoes one time. My mom did warn him not to force feed me anything. Let's just say that I was quite picky when I was a kid, and I had several nono foods that nobody should have made me eat.... In the order of least to most loathed: Gravy, Beans (Baked Beans most of all), Bologna, Hot Dogs, and Offal. These are things that I refused to eat as a kid, and the top three are still on my no-no list to this day. I learned how to make gravy properly in school... You know, with roux and milk or stock? The minute I tried it, I found out just how much I was missing out on. Gravy wasn't this gross, lumpy stuff, and it wasn't a glue like substance that I loathed... It was a nice, shiny sauce with tons of flavor that had a nice mouth feel. I used to think I would never be able to master the art of the sausage gravy, but I was also trying to fru fru it up like one of those french cuisines, when really, it didn't need to be so complicated. My husband even convinced me one time to eat the gravy that you make from a pouch, and I was not amused. It was the pouched version that got me to understand why I despised gravy as a kid... Let's just say that it was slimy and off tasting, and had way too much sodium. Gravy making, specifically sausage gravy, is easy... You don't need all those frills to make it delicious and you don't need to make it from a pouch. KISS. Keep it simple, silly. Lastly, this is not diet food. Proceed with full disclosure. THE RECIPE
THE METHOD
Over medium high heat....
Brown your sausage
If you don't have enough drippings (you need at least 2 TBSP)....
Add the appropriate amount of butter... Yes... Butter. Told ya this wasn't diet food!
Add the 2 TBSP of flour...
And cook out the raw flavor....
Pour in the milk...
Bring that to a boil and then let simmer until thickened to desired thickness.
Don't forget the pepper!! Seriously, pepper that beast!
Serve over your choice of starch! I prefer biscuits, especially fresh drop biscuits. And yes, those are easy too! I will add the recipe for that in a separate post.
Tip: If your gravy gets too thick, add a little bit of water to thin it out or more milk. If you add milk, add it right before you serve. 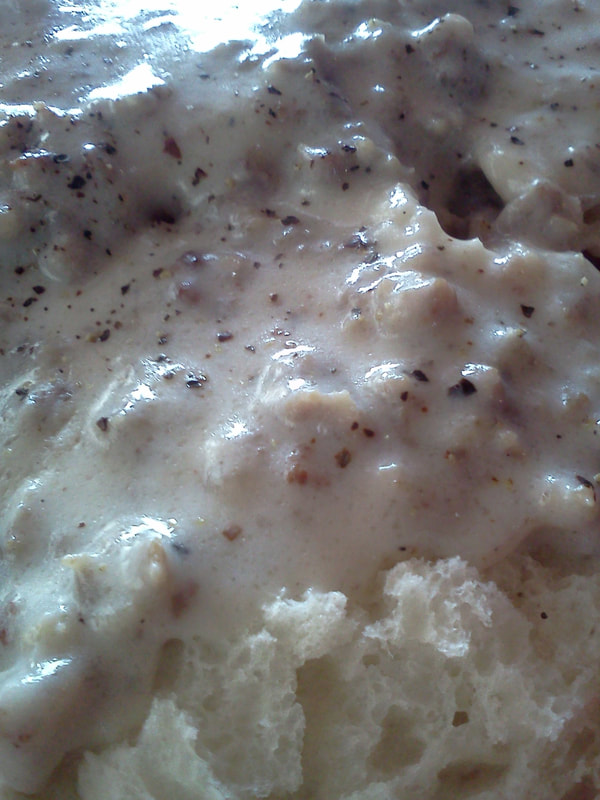
I hope you enjoy how quick and easy it is to make sausage gravy. Please let me know how it turns out! Enjoy, my foodie friends.
Much Love, Kimmie 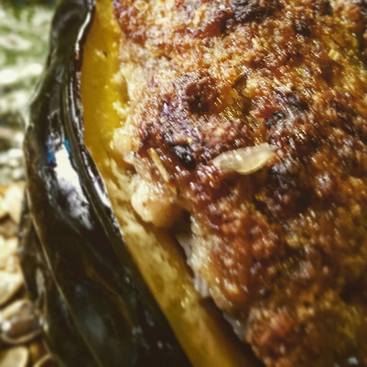
This is a story that started off with a broken oven, and a husband issuing the line that he doesn't know is a challenge to his wife, "My mom made it this way." That's right, my oven did not work, and somehow, I was supposed to roast a few acorn squash for supper one day, and he had to go and tell me the way his mom used to make it... Now, I don't know about how you would have felt being issued such a challenge, but I lifted my chin and accepted it because that is how I roll.
I had a hard time, naturally, trying to figure out how to do this... I had to pick the best alternative method of cooking the squash. I had a toaster oven, a Nuwave oven, and a microwave... The microwave was automatically a no, and the toaster oven, while it would have been good if there was much room in there, and the Nuwave works more like a broiler, but there was enough room for two, halved squashes. I picked the Nuwave. It isn't necessarily my favorite method of baking things, but that Nuwave has done me many great services whenever there is an oven fail. I managed to make a delicious dinner despite the adversity I faced in the kitchen. And my husband? Well, he was all over that squash. 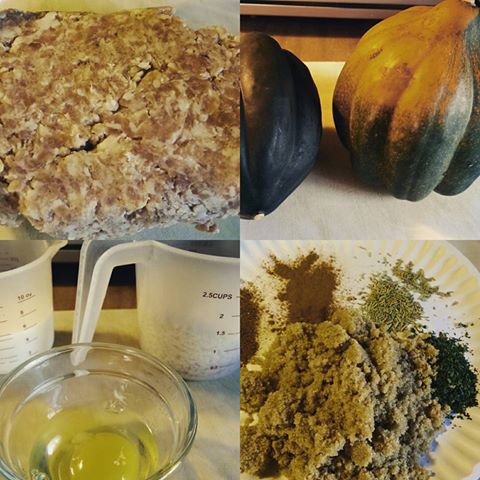
THE RECIPE
If you are using a normal oven...
Preheat to 175 c/350 F
In a large mixing bowl...
Combine sausage, sugar, seasoning, milk, bread crumbs, and egg. Use hands to mix well.
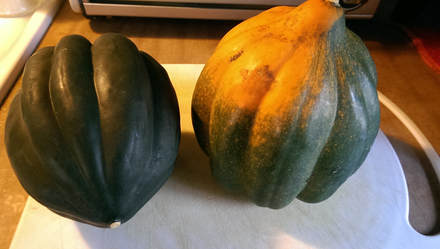
Brush squash halves with....
Olive Oil, and sprinkle with salt and pepper.
Form sausage into four, equal balls....
And place each into the cavities of the squash halves.
Bake for an hour or until sausage is cooked through, and squash is tender.
If using a Nu-wave - bake for 45 minutes or until the same results are achieved.
Let me tell you that when I first ate a bite of this, I was kind of shocked at how delicious is was. It has a nice, sweet and savory thing going on! I absolutely loved it, and it wasn't exactly as Bruce's mom made it, but it was still Bruce approved. If I can get the man to eat veggies, I am a happy wife.
I hope you enjoy this recipe as much as I have! I certainly had fun making this one and taking up the challenge that he issued. A word to the wise, men, telling your wife, "But my mom made it this way," is not cool, man... I say with amusement. But I digress, please do give this one a try even if you are not a fan of squash, you might be surprised! Much Love Kimmie 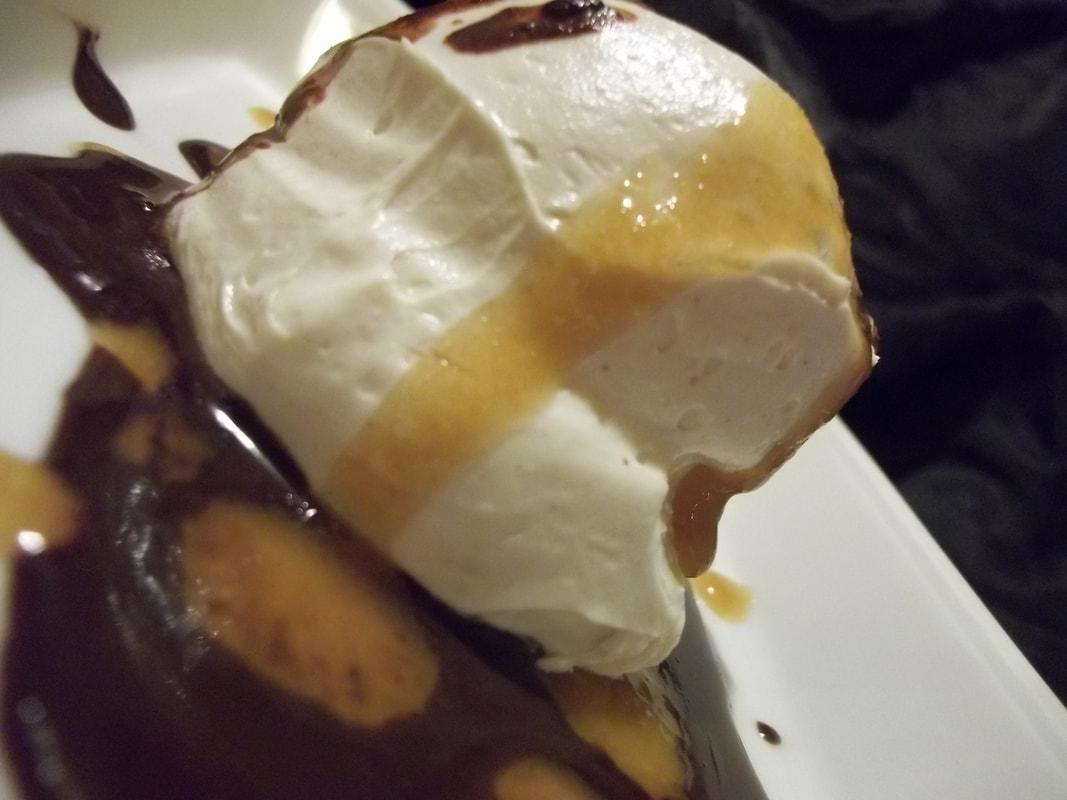
While I know how to make mousse from scratch, it is generally not my favorite thing to do because it takes FOREVER, okay? Yes, there are sometimes where shortcuts aren't going to kill you. Like, for instance, if I can get away with making chocolate mousse without having to bloom gelatin, I will. This recipe will take a little more effort than making pudding and folding whipped cream in, and it tastes almost as rich and is about as decadent as the original. You ready for it?
Easy Mousse w/Variations
Ingredients | Equipment
METHOD
In your mixing bowl...
Place your cream cheese and whip it.
In your double boiler....
Put your chocolate chips in, make sure the water is not touching the bottom of the container or bowl, and that your water is at a light boil. Melt your chocolate gently, stirring constantly with your wooden spoon.
Pour the chocolate over the cream cheese...
Using the whisk or mixer to incorporate chocolate and cream cheese together thoroughly. Make sure to scrape as much chocolate from the one bowl into the other.
Make your whipped cream by whisking vigorously into another bowl...
Or use premade stuff... Put that into your bowl and fold into the chocolate and cheese mixture to make a nice, fluffy mixture. Place top on bowl, then put into the fridge and let it sit for at least an hour.
FOR OTHER FLAVORS:
Add instead of chocolate
Have fun licking the bowl!
Much Love, Kimmie 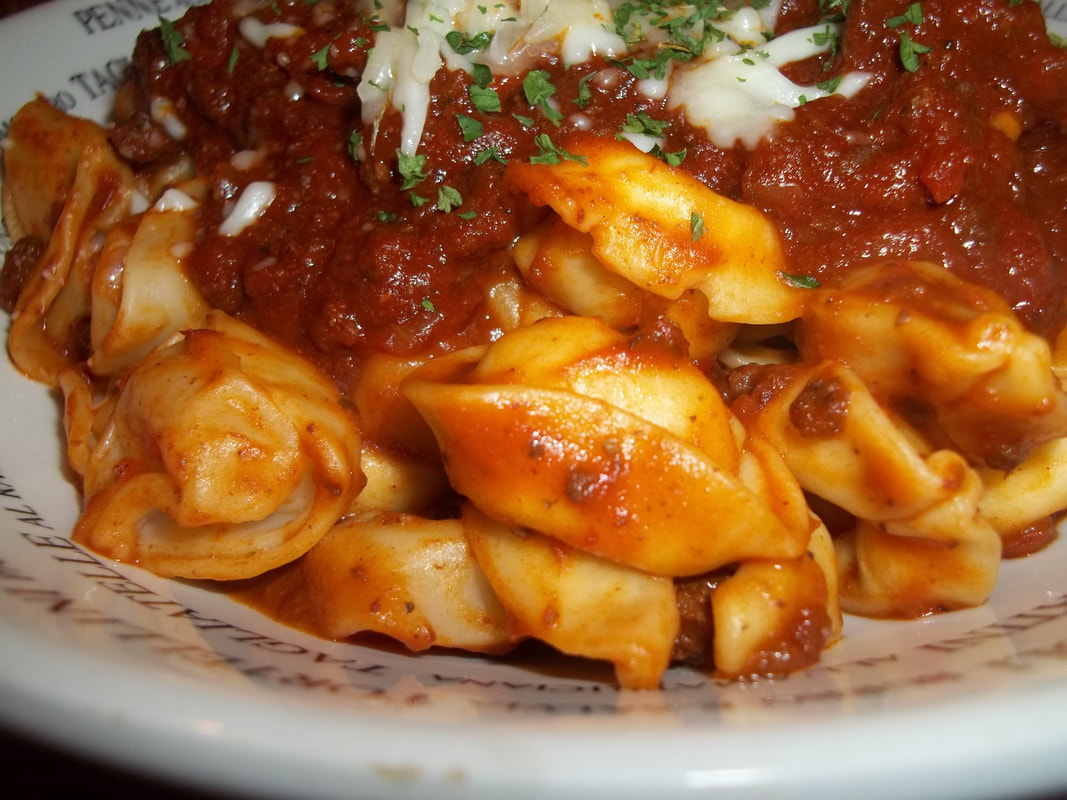
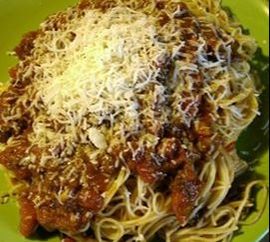
I am not Italian. I was born with mostly Germanic blood, a handful of Irish, and a smidgen of Sioux, but not Italian. If I could claim to have such a rich heritage I would, but alas, not I. I’m saying this because I love to cook pasta more than anything in this world, particularly Spaghetti. I dare not call my sauce “traditional,” though- oh no! That would be blaspheme… I do try to stay as close as possible, but my ragu is not your Nana’s.
This is one of my older recipes from the old site, but it is still a favorite of mine. I want to start off by saying that this is MY take, and is not authentic, Italian Ragu or Marinara. Before I get to the recipe, though, I would like to share the story about my sauce with you. I had stated in the post prior to this one, that my mother taught me basics like spaghetti... The sauce wasn't ever home made, however, it was from a jar or a can because nobody in the household knew how to make home made spaghetti sauce. I didn't care that it was from a jar, though, because it wasn't about that for me. I was spending time with my mom and she was teaching me something. Once I went to culinary school, I learned how to make a bunch of things like spaghetti (noodles and all) from scratch, and oh man... If you have never experienced the texture of a home made spaghetti noodle and the sumptuous feel of sauce that you made from fresh ingredients? You, my friends, are missing out. When I got home from school, the first thing I wanted to do for my mom was to make her as close to that as I could get. Since I didn't have all of the tools, like a food mill or a pasta maker, I had to meet childhood and adulthood spaghetti somewhere in the middle. It is not from scratch, but it is mostly home made. Now my mom can't stand eating it if it is in a jar... It was pretty cool knowing that I taught my mom how to elevate something SHE taught me how to cook! 
THE RECIPE
Your Ingredients
In a large skillet or a dutch oven (On Medium-High):
Saute the meat with the onions, the peppers, and half of the amount of seasoning you want to use.
Once the meat is browned and the vegetables are soft:
Drain any excess grease, making sure to leave some for flavor, and drop in your tomato paste.
When the tomato paste starts to smell sweet:
Add your remaining ingredients, being sure to adjust seasoning.
Cover the pot/skillet and turn down to simmer for at least 30 minutes, stirring occasionally. Add some of your pasta water to marry the sauce to the pasta.
When the sauce is ready, toss some into your pasta as you would dress a salad, as this keeps the noodles from clumping. Then top with more of the sauce, as much or little as you like.
Some TIps:
I hope you have enjoyed this recipe with me, and please do share it with others as I have shared with you, my foodie friends.
This is and will always be one of my favorite things to eat because it brings me back to a simpler time in life and being able to spend time with my mom in the kitchen. This is from my table to yours. Please feel free to leave a question or comment for me, and I will do my best to give you an answer. Much love, Kimmie 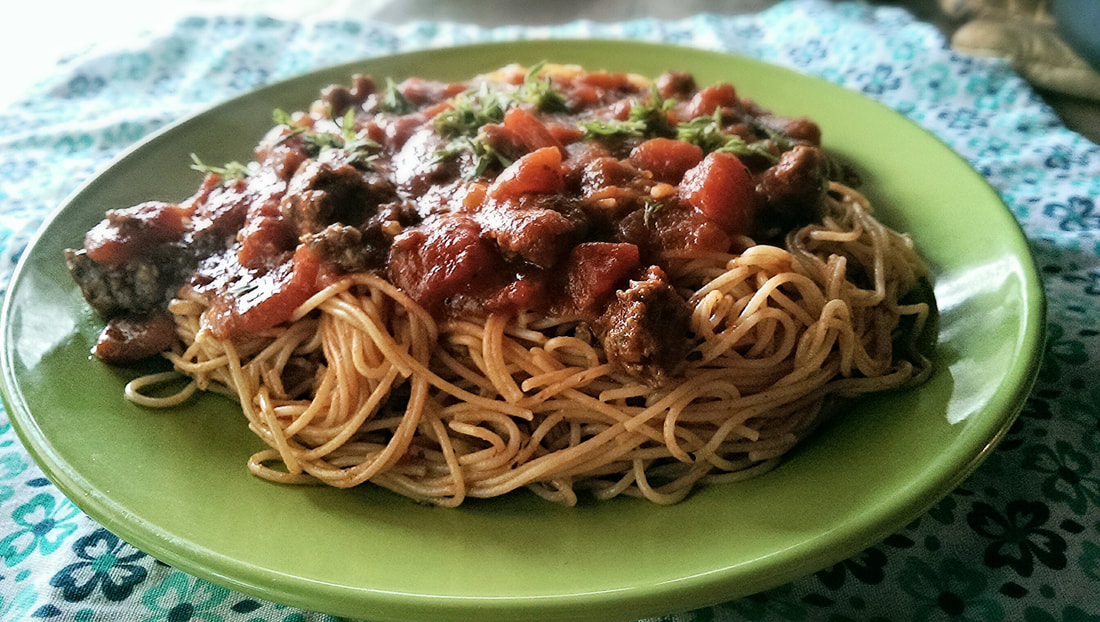
 I have to start over from scratch, and that is okay. Running a blog off and on for years on your own domain has advantages, sure, but I lost everything multiple times because of circumstances that were out of my control. I was very upset and angry the first time, and pretty frustrated the several times after that and decided to take a long break from doing my thing. But I find myself needing an outlet on words and I didn't want to just give up completely, not when this is one of my passions. That is why I decided that instead of picking back up on my blogger, that I wanted to make a brand new blog. Foodie-Zoo will always be a part of me, but it is time to move on and show you something more... me! I hope that this will bring joy to my readers, and that my starting over is for the best. WHY I STARTED COOKING I grew up below the poverty line, so a lot of the foods that I ate as a kid were just not the kind of food that people like to eat nowadays. When I was a kid, green beans came from a can, potatoes were from a box, and pork chops were economical so they were always on the menu, and thanks to dad, they were always shoe leather because he liked his pork chops well done and crispy. I used to loathe when mom had to work during the evenings because it meant that dad was cooking, and back then, his recipe box consisted of only a few things. I guess you can say that at some point, you get sick of eating the same thing over and over again, especially when it is not so very good and it is hard to swallow. I still, to this day, cannot look at a can of green beans without wanting to throw up. I will eat them on rare occasion if there is nothing else to eat or if my host cooks those and I don't want to be rude, but not if I do not have to. I was eight when I begged mom to teach me how to cook. It started off with just simple things like mac n cheese, spaghetti, grilled cheese, and a few other easy things... And then it progressed over the years as my hunger for better food developed. When I was about fifteen, I was sitting in class in high school and it was career day. The representative to a culinary school -- Gasp, something I didn't even know existed!! - showed up and began to talk to us about culinary school and food. I was enthralled... I listened intently, that day, and it changed my world forever because it sparked a hunger in me to become a chef. After high school, I did go to culinary school! I went for seven months and had so much fun even though it was extremely hard. I didn't always love it there, but chalk that up to teenage angst and missing my family. I wanted to complete school, but because I had been in a car wreck that messed up my neck, I had to go home reluctantly. I still took home a whole new level of knowledge, and have continued my passion for cooking. WHAT NOW? Now it is time to get my journey back on track. I just want to have fun and get this thing going again, bring some new recipes as well as some old, and work on opening up more as someone who has been at the cooking game for a long time. It is my hope that I can help to inspire people with what I do.
With that all being said, I hope you enjoy this fresh start! Please be sure to follow me, share me, and comment to me! Much love, Kimmie |

The Eccentric Foodie
Food Tip
Cooking bacon in the oven is the easiest way.
Recipes
These are various recipes that either I created, or I found and adjusted to what I thought would be awesome or even healthier. Archives
March 2020
Categories
All
|
 RSS Feed
